Additional Product Optionsnew
Often there is a lack of additional static information about the product when ordering it. For example, you want to know what caption the buyer wants to print on the front and back of T-Shirt or what words to engrave on wedding rings, whether it is necessary to contact the client to confirm a small order, and whether it is possible to write the client to the mailing list after the order.
You won't be able to do such a form by default. Especially for this case, we wrote an exclusive additional product options generator ↗ (opens in a new tab) for our theme.
Steps to generate the form above for a product individually
Create product metafield
This first step only runs once if it hasn't been done before or metafield was deleted.
- From your Shopify admin, go to Settings > Metafields ↗ (opens in a new tab).
- Click Products.
- Click Add definition.
- In the Name field, enter product_line_properties, and then select that name from the list.
- Click Select content type, and then select Multi-line text from the list.
- Click Save.
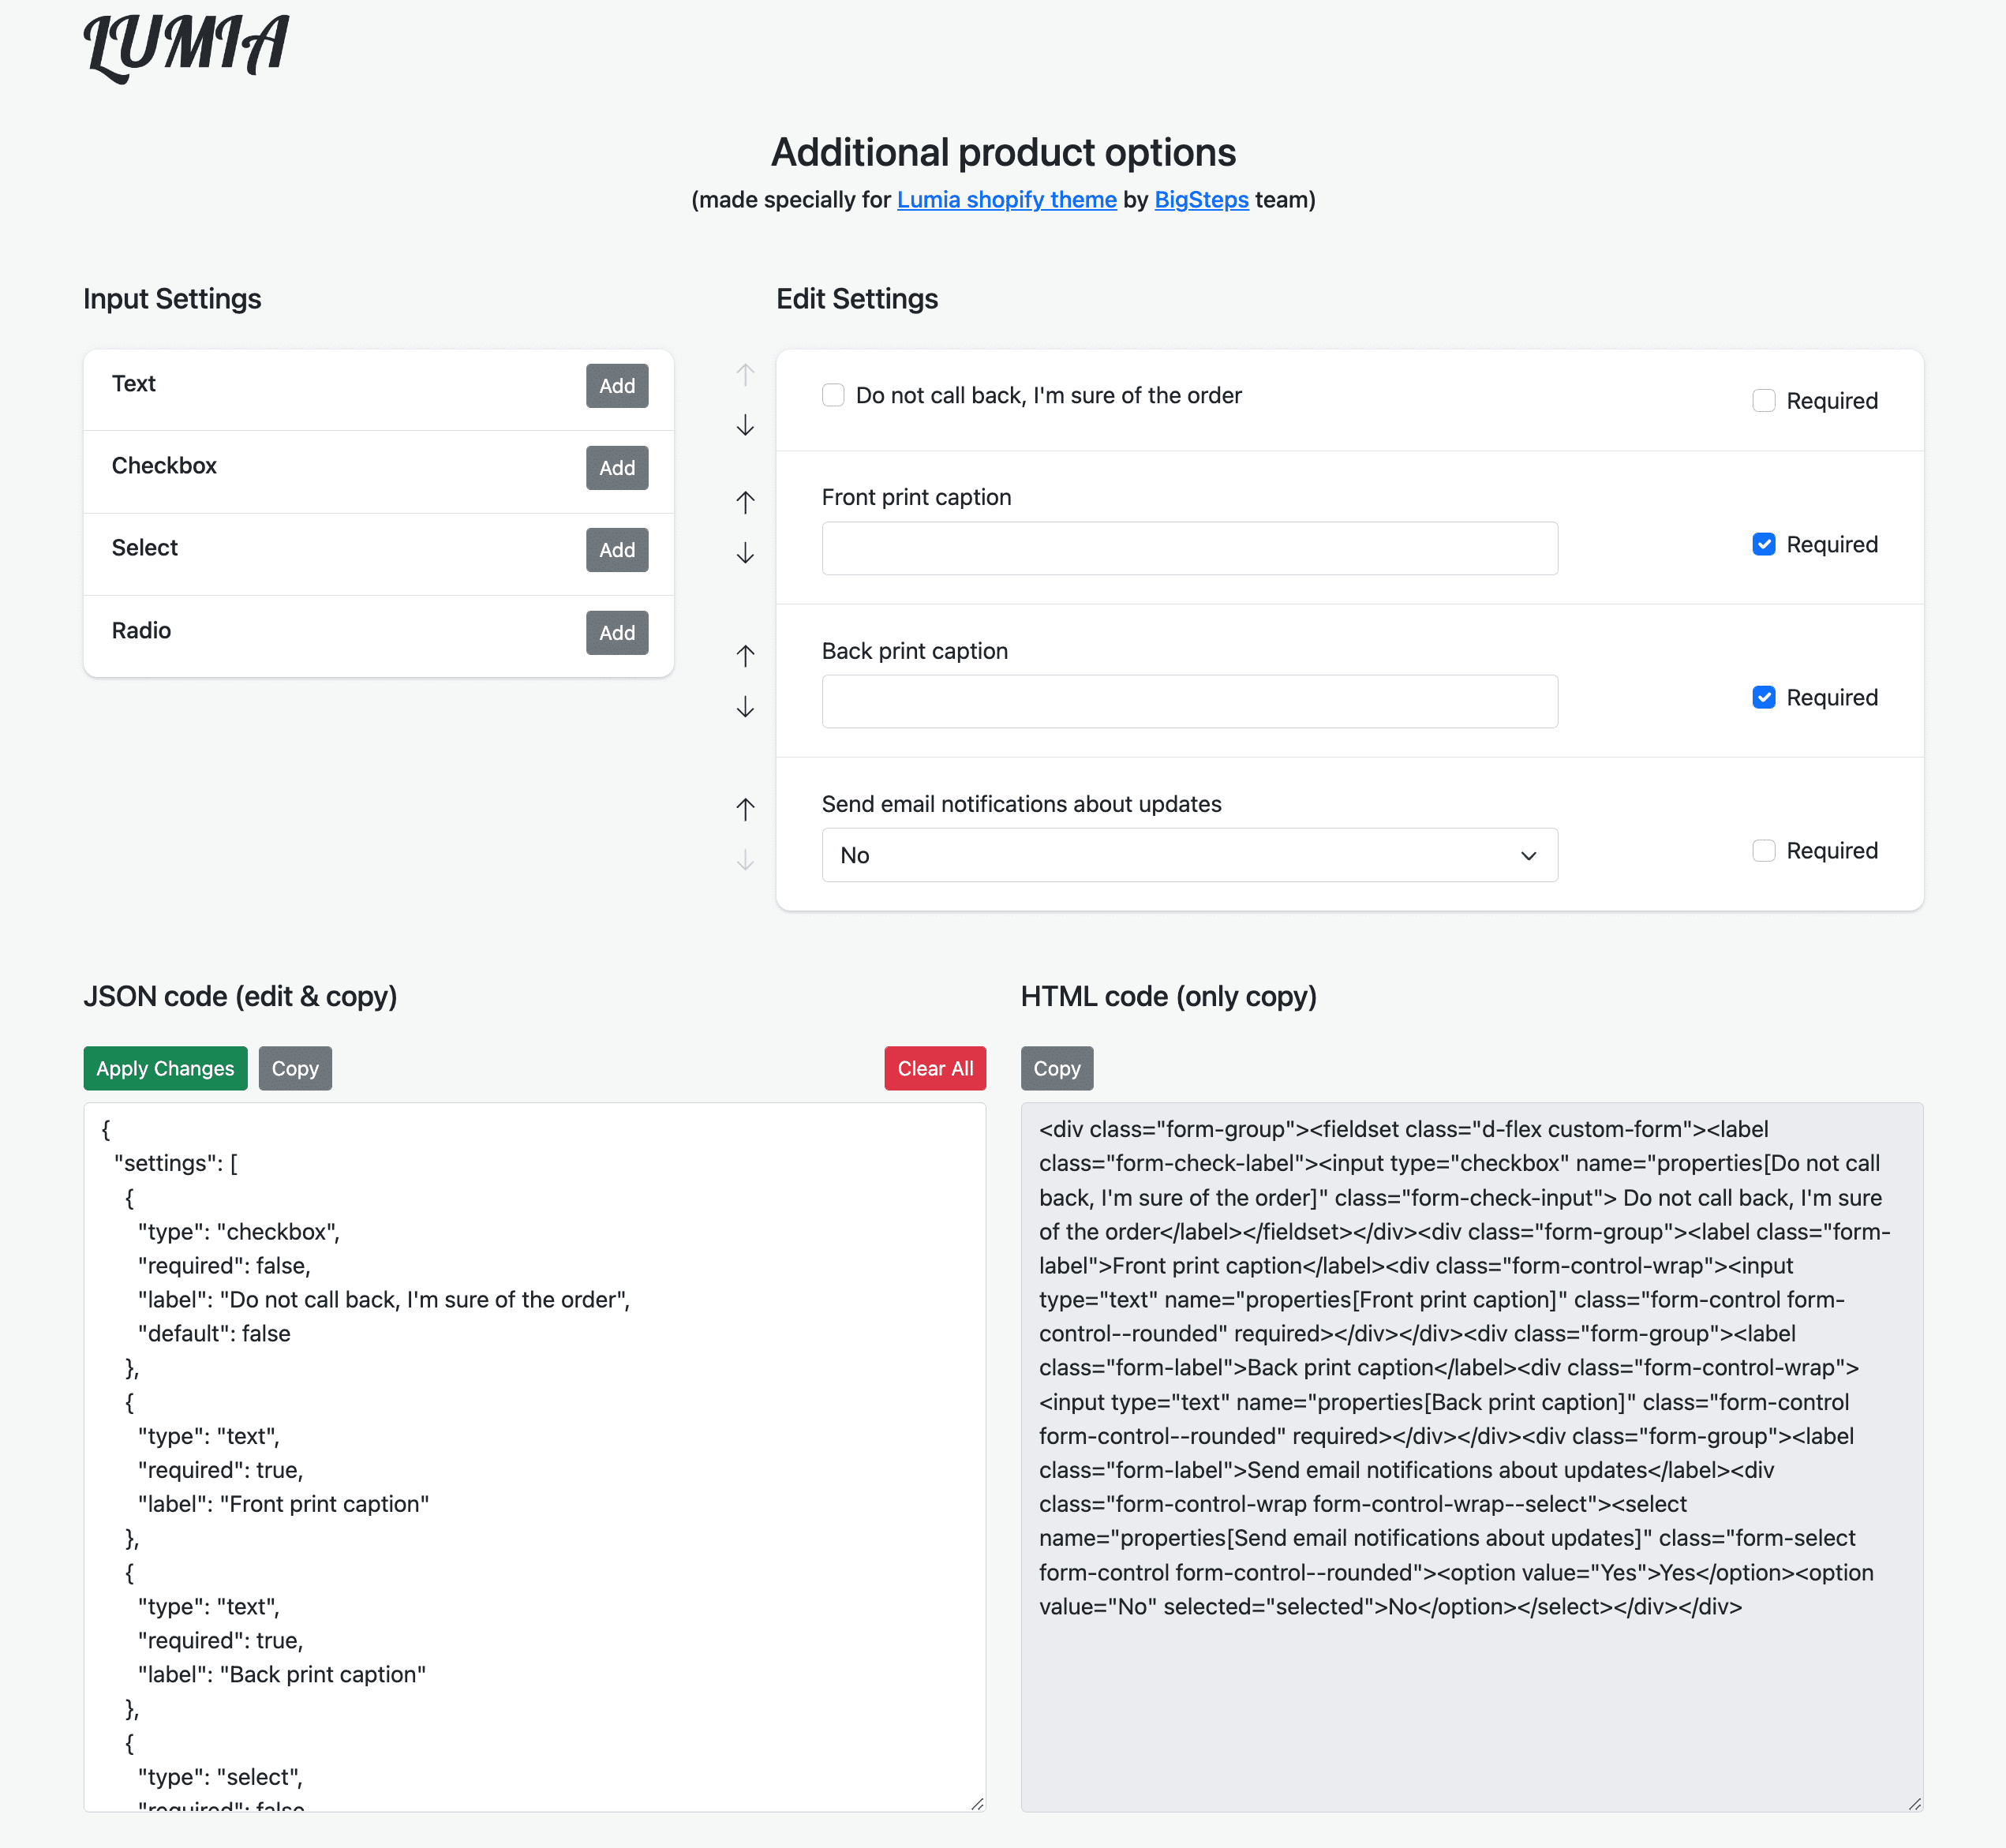
Open form generator
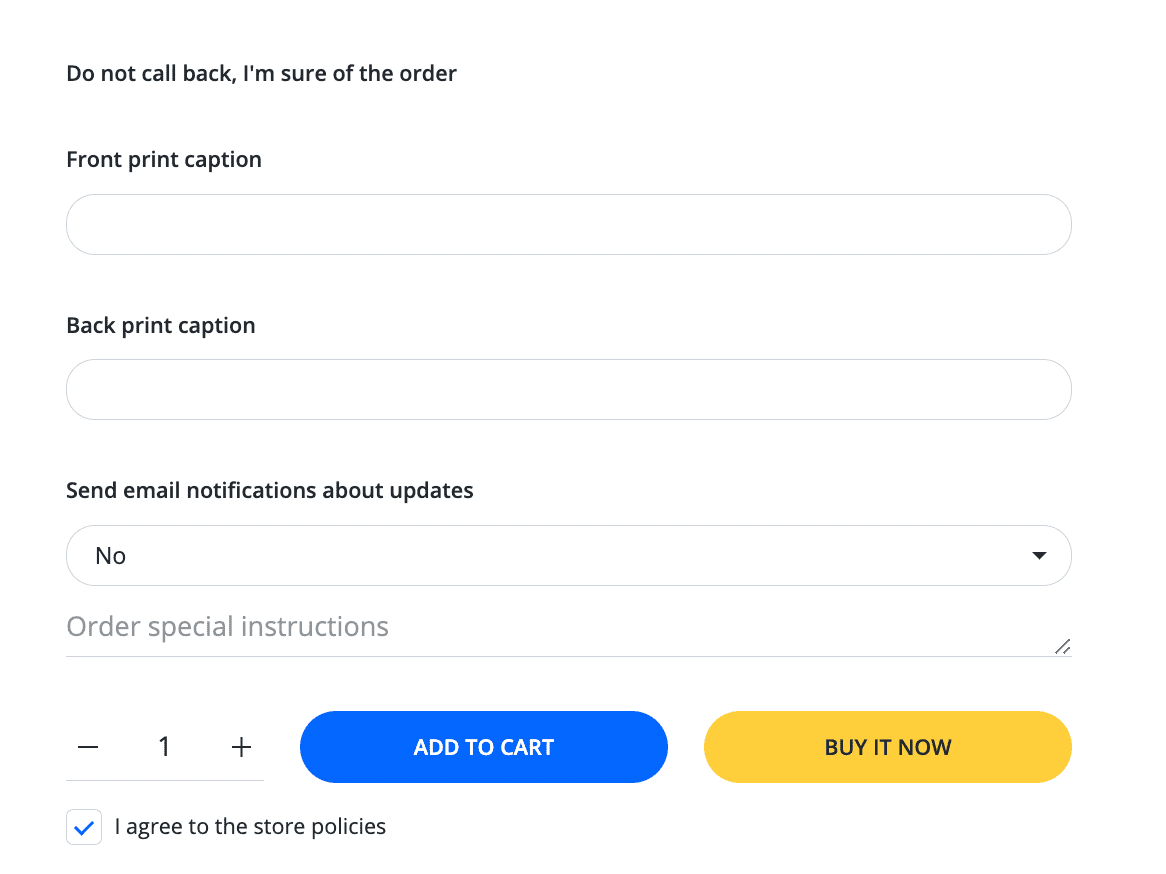
Add checkbox option Do not call back, I'm sure of the order
- In the fields group Input Settings click Add button in the Checkbox row.
- In the fields group Edit Settings click Edit in the Checkbox Label row.
- Remove Checkbox Label and write Do not call back, I'm sure of the order in the Label field.
Add input option Front print caption
- In the fields group Input Settings click Add button in the Text row.
- In the fields group Edit Settings click Edit in the Text Heading row.
- Remove Text Heading and write Front print caption in the Label field.
Add input option Back print caption
- In the fields group Input Settings click Add button in the Text row.
- In the fields group Edit Settings click Edit in the Text Heading row.
- Remove Text Heading and write Back print caption in the Label field.
Add input option Send email notifications about updates
- In the fields group Input Settings click Add button in the Select row.
- In the fields group Edit Settings click Edit in the Select Heading row.
- Remove Select Heading and write Send email notifications about updates in the Label field.
- Add values Yes and No.
- Set value No as default.
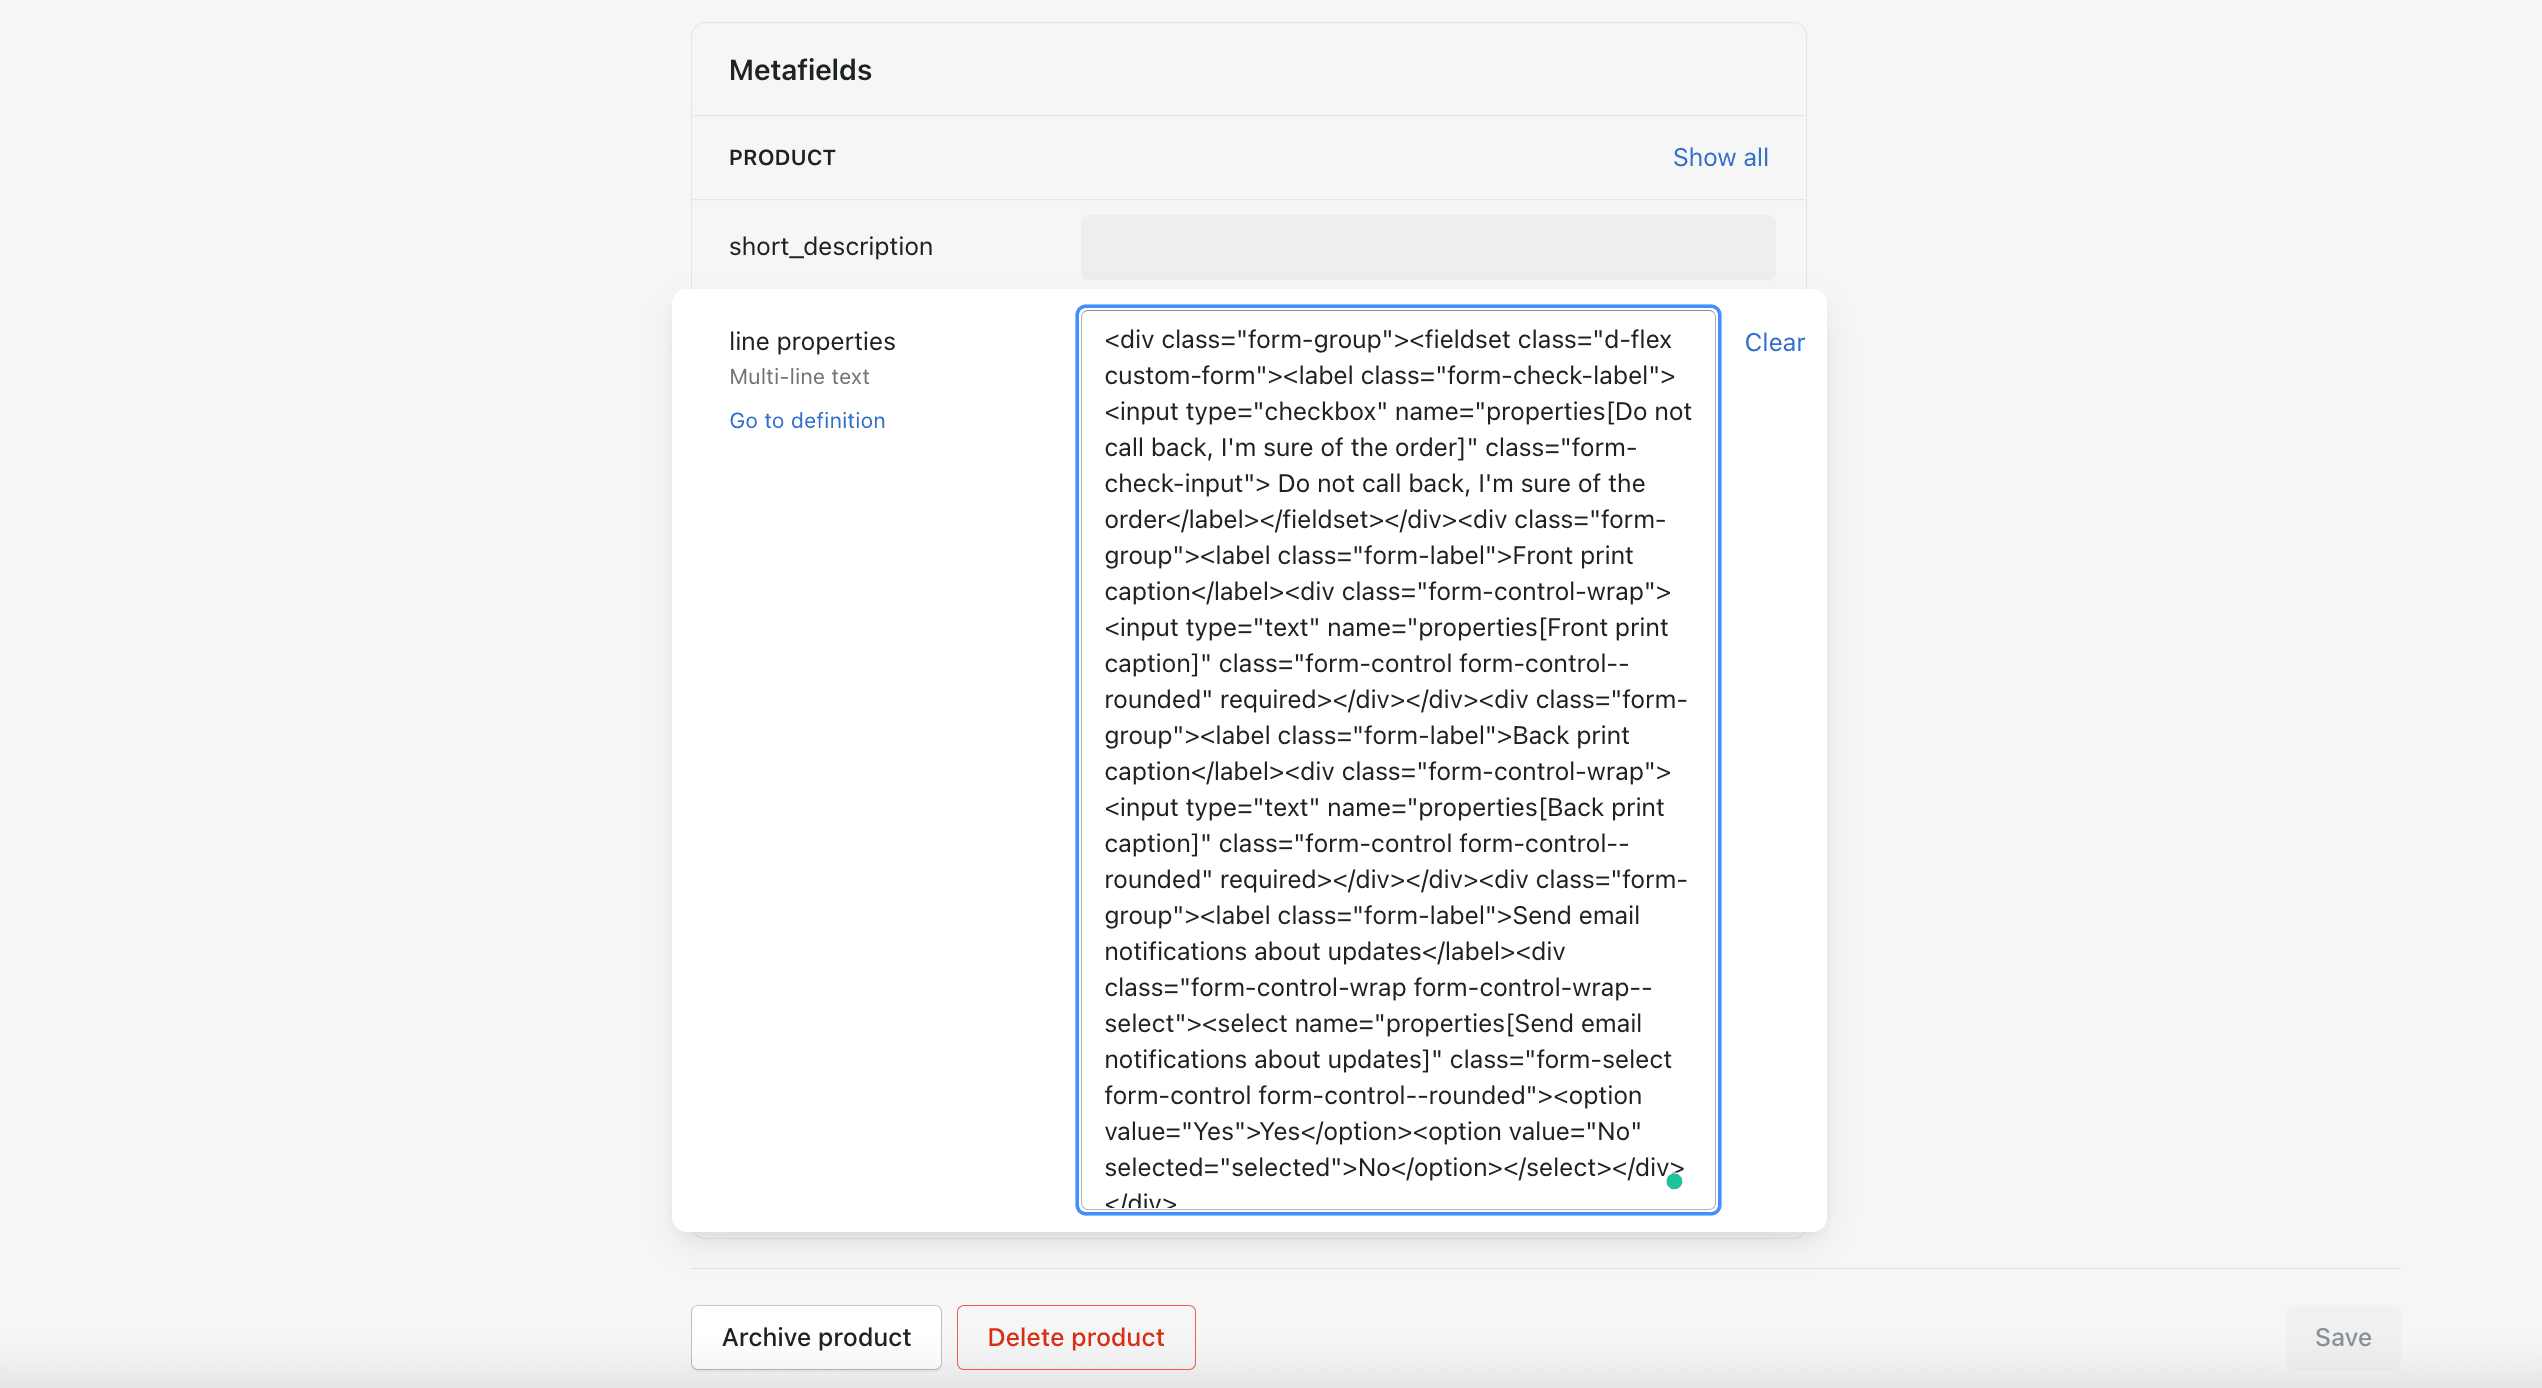
Copy generated html and paste in product metafield
- In the fields group HTML code (only copy) Click Copy.
- From your Shopify admin, go to Products ↗ (opens in a new tab).
- Click on a product to see its details page.
- Click on the product_line_properties metafield at the bottom of the product page.
- Paste generated html.
- Click Save.

Our forms generator uses localstorage. That means that the form that you are generating is saved in the browser memory at once. Even if you close your browser tab or turn off your computer, the last state of your form is still kept in memory.
How to create a form back in the generator based on the previously saved html?
Let's say you make different forms for different products and you don't want to rebuild the forms every time in the generator to change just one parameter.
This is exactly what the section JSON code (edit & copy) is for. If you plan to edit the form in the future, we recommend saving it.
In the fields group JSON code (edit & copy) click Copy. Save this code anywhere on your side for future re-use.
If you paste the code back in that area JSON code (edit & copy) and click Apply Changes then the form will be reverted for editing.