Link Options
Badges
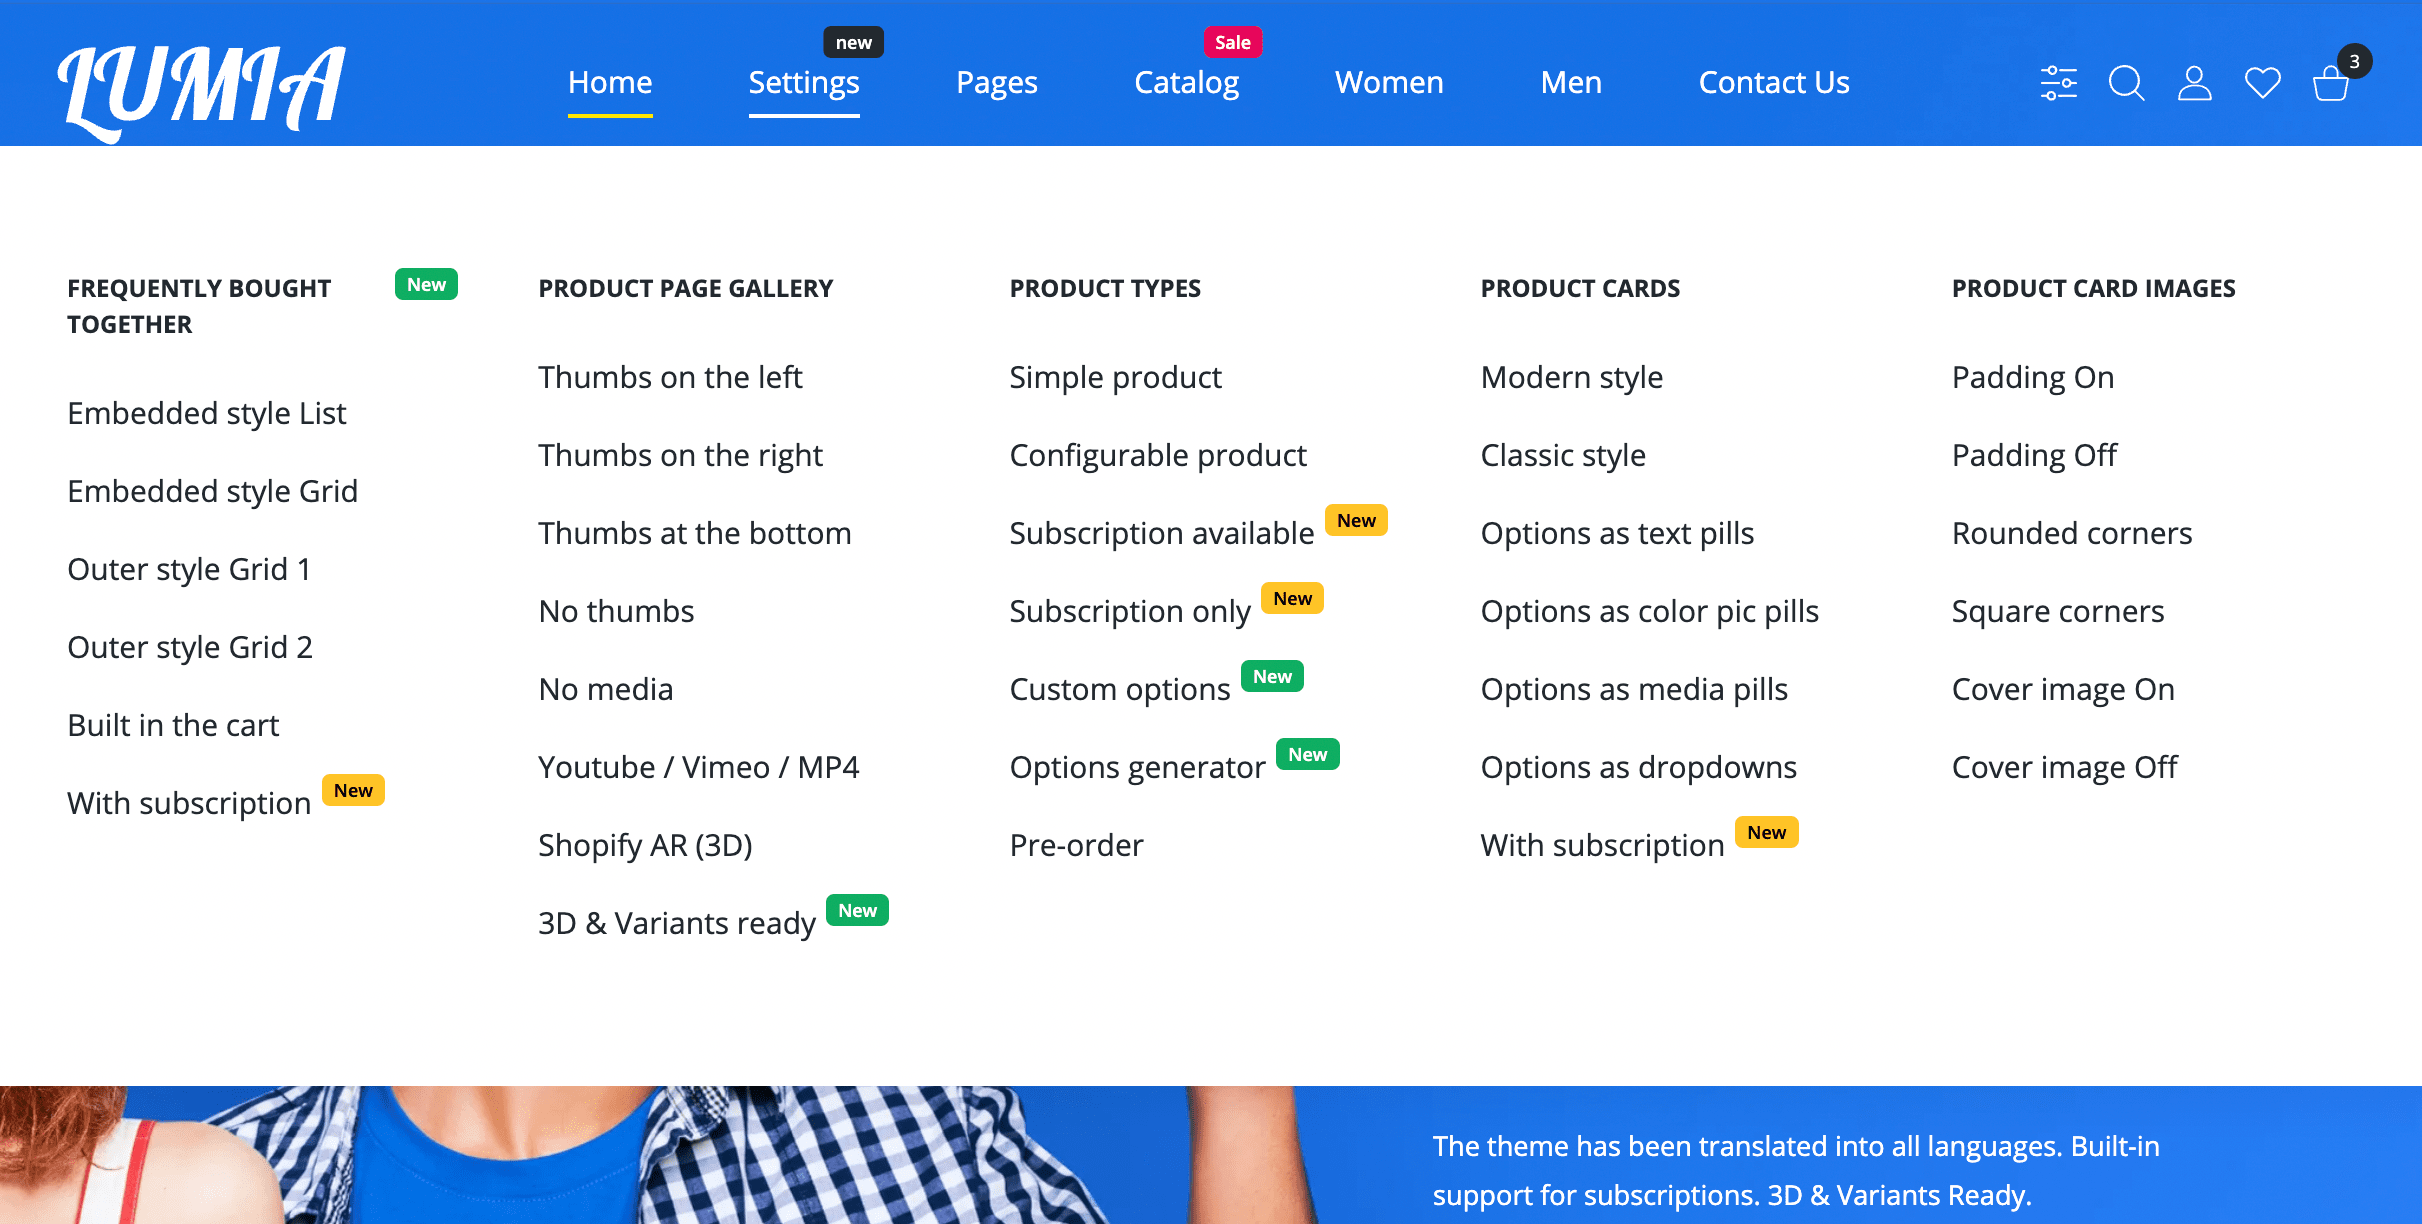
To highlight some items from the total mass for the priority focusing of the buyer's attention, our theme has special badges. Badge can have any text and color.
Steps to enable
- From your Shopify admin, go to Online Store > Navigation ↗ (opens in a new tab).
- Click the name of the menu that includes the item.
- In the Menu items section, click Edit beside the name of the item.
- You need to add a pseudo elements in the end of Name field.
|badge-color:3|badge:My badge textbadge-color can be from 1 to 4 (preset colors):
- 1 - Black
- 2 - Orange
- 3 - Red
- 4 - Green
Each preset color you can change to your own in Theme Settings > Colors - Badges.
- Click Apply changes.
- Click Save menu.
Example from our demo
Catalog menu item.

Catalog|badge-color:3|badge:Sale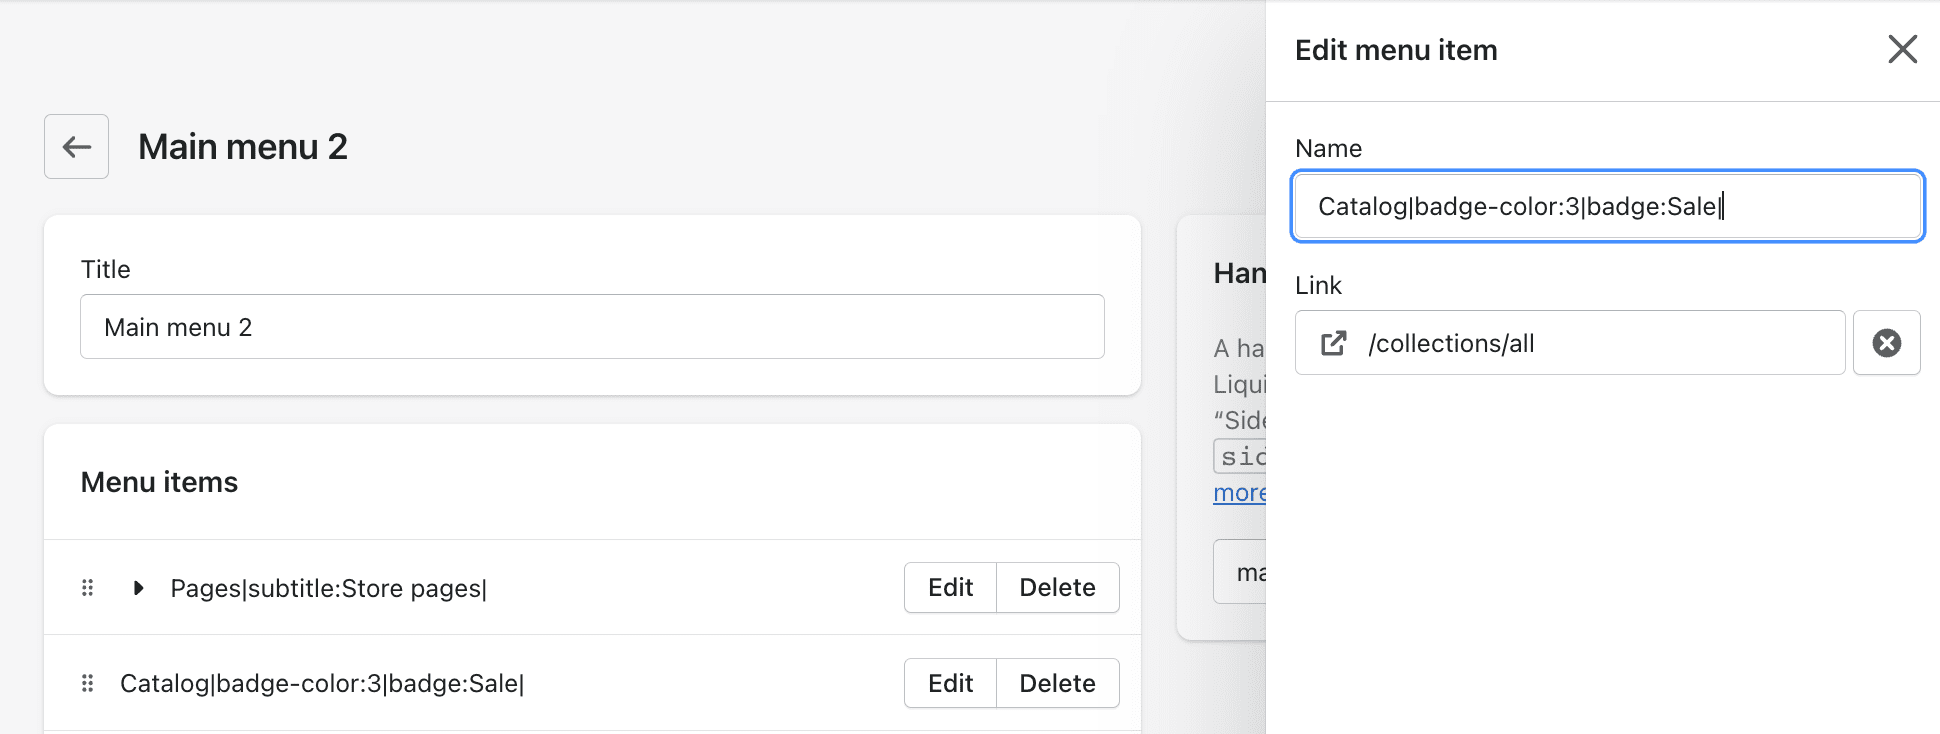
Icons
![]()
Steps to enable
- From your Shopify admin, go to Online Store > Navigation ↗ (opens in a new tab).
- Click the name of the menu that includes the item.
- In the Menu items section, click Edit beside the name of the item.
- You need to add a pseudo element in the end of Name field:
|icon:icon-codeicon-code you can get in the available icons list ↗ (opens in a new tab) or upload your ownupload your own.
Examples
Icon in 1st level of navigation
Backend
![]()
Frontend
![]()
![]()
Icon in 3rd level of nested navigation
Backend
![]()
Frontend
![]()
Default dropdown caption

Steps to enable
- From your Shopify admin, go to Online Store > Navigation ↗ (opens in a new tab).
- Click the name of the menu that includes the item.
- In the Menu items section, click Edit beside the name of the item.
- You need to add a pseudo element in the end of Name field:
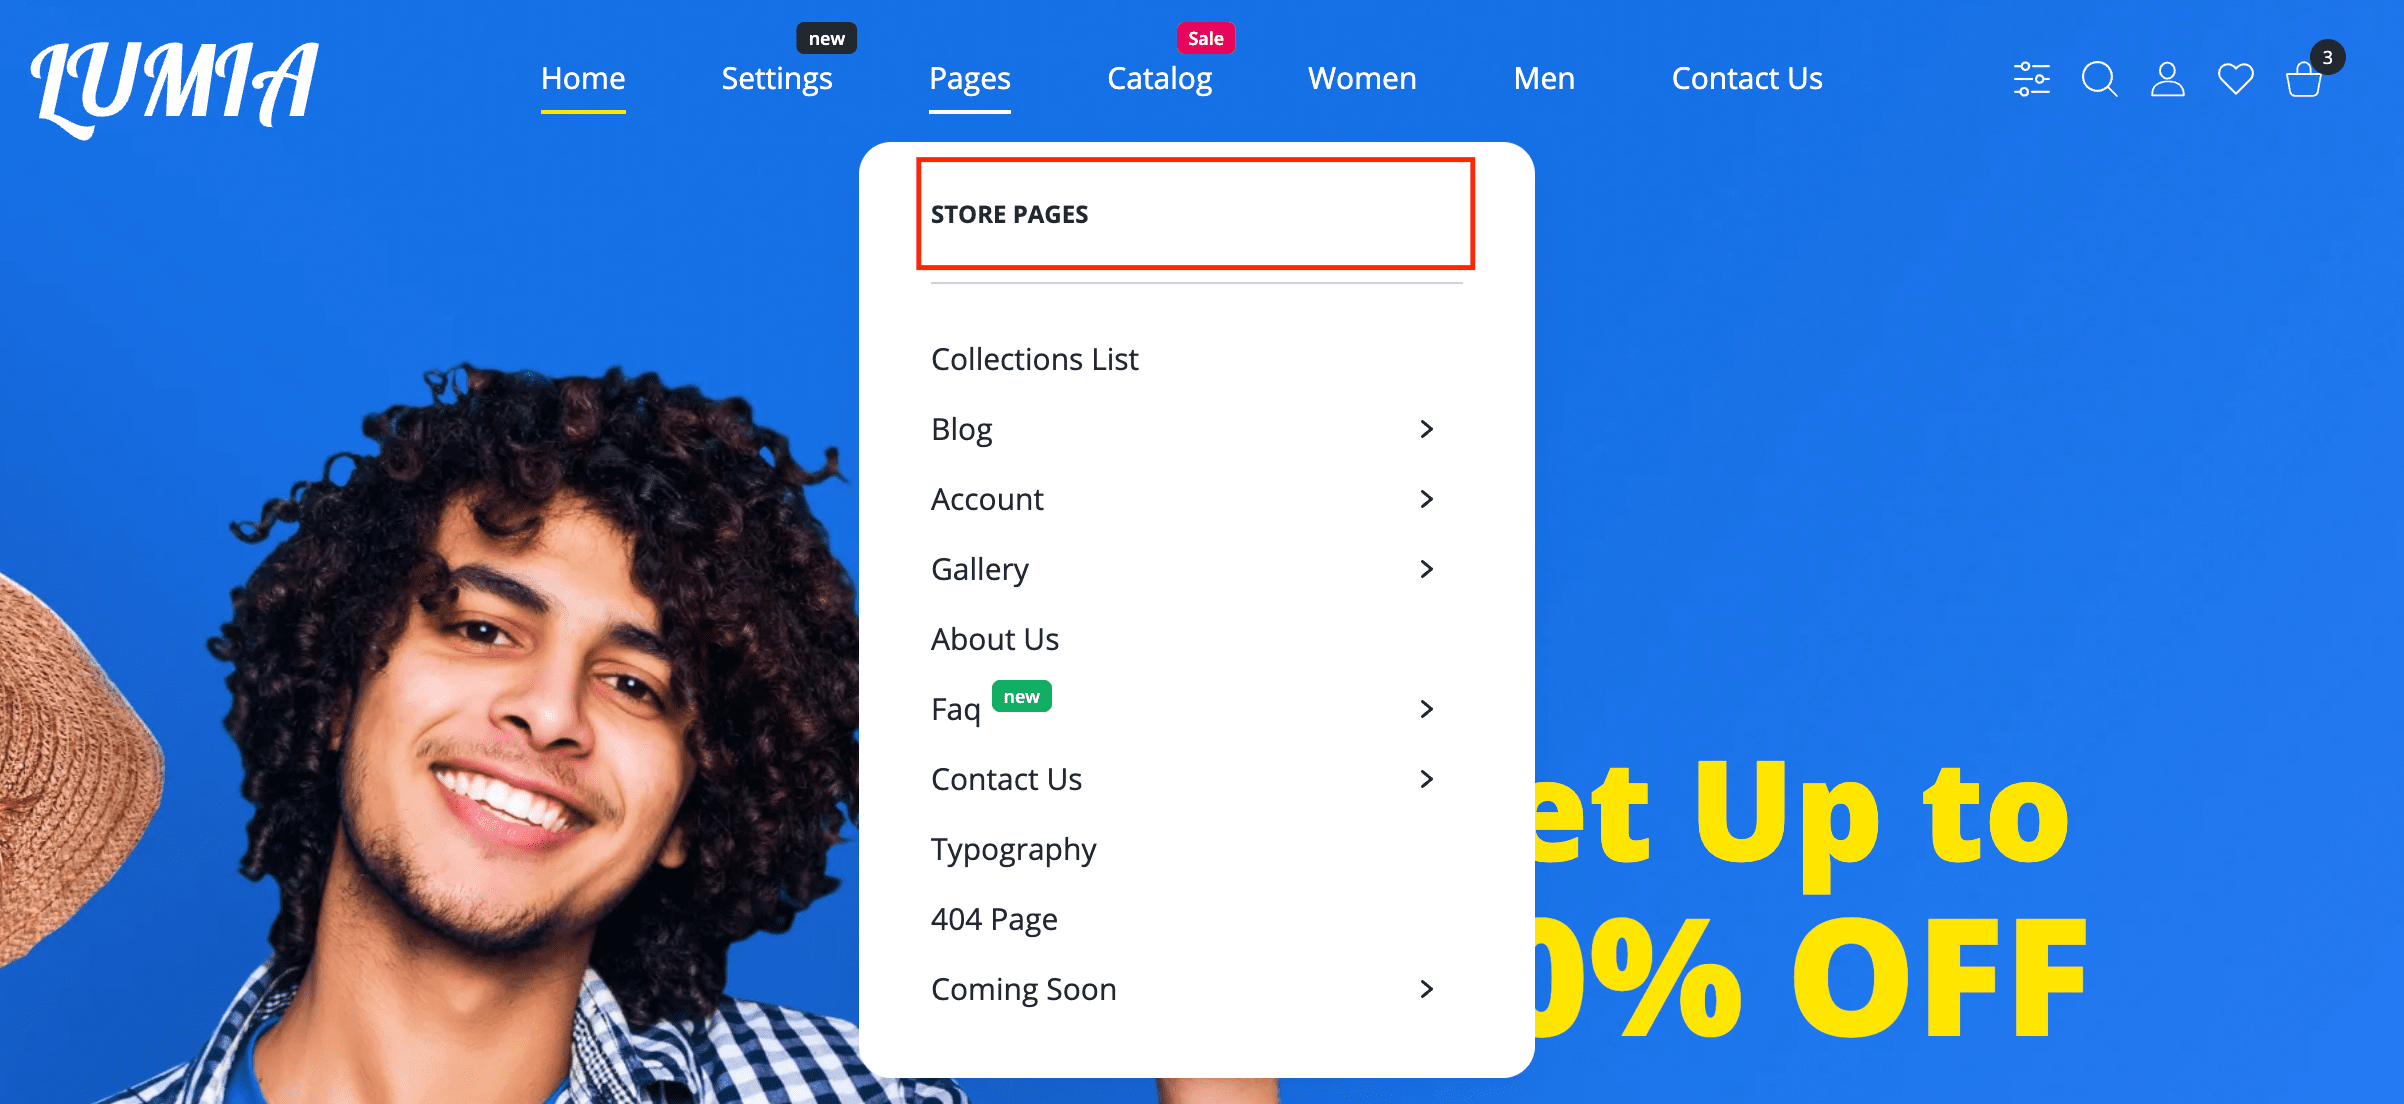
|subtitle:My caption text- Click Apply changes.
- Click Save menu.
Example from our demo
Pages menu item.

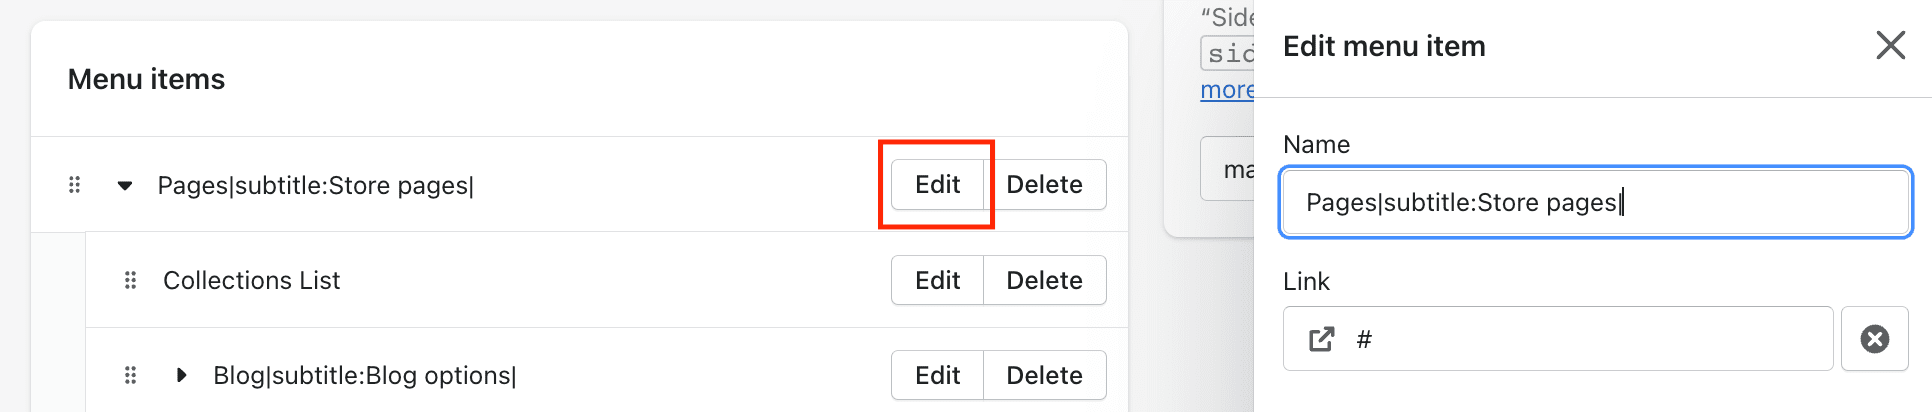
Pages|subtitle:Store pages
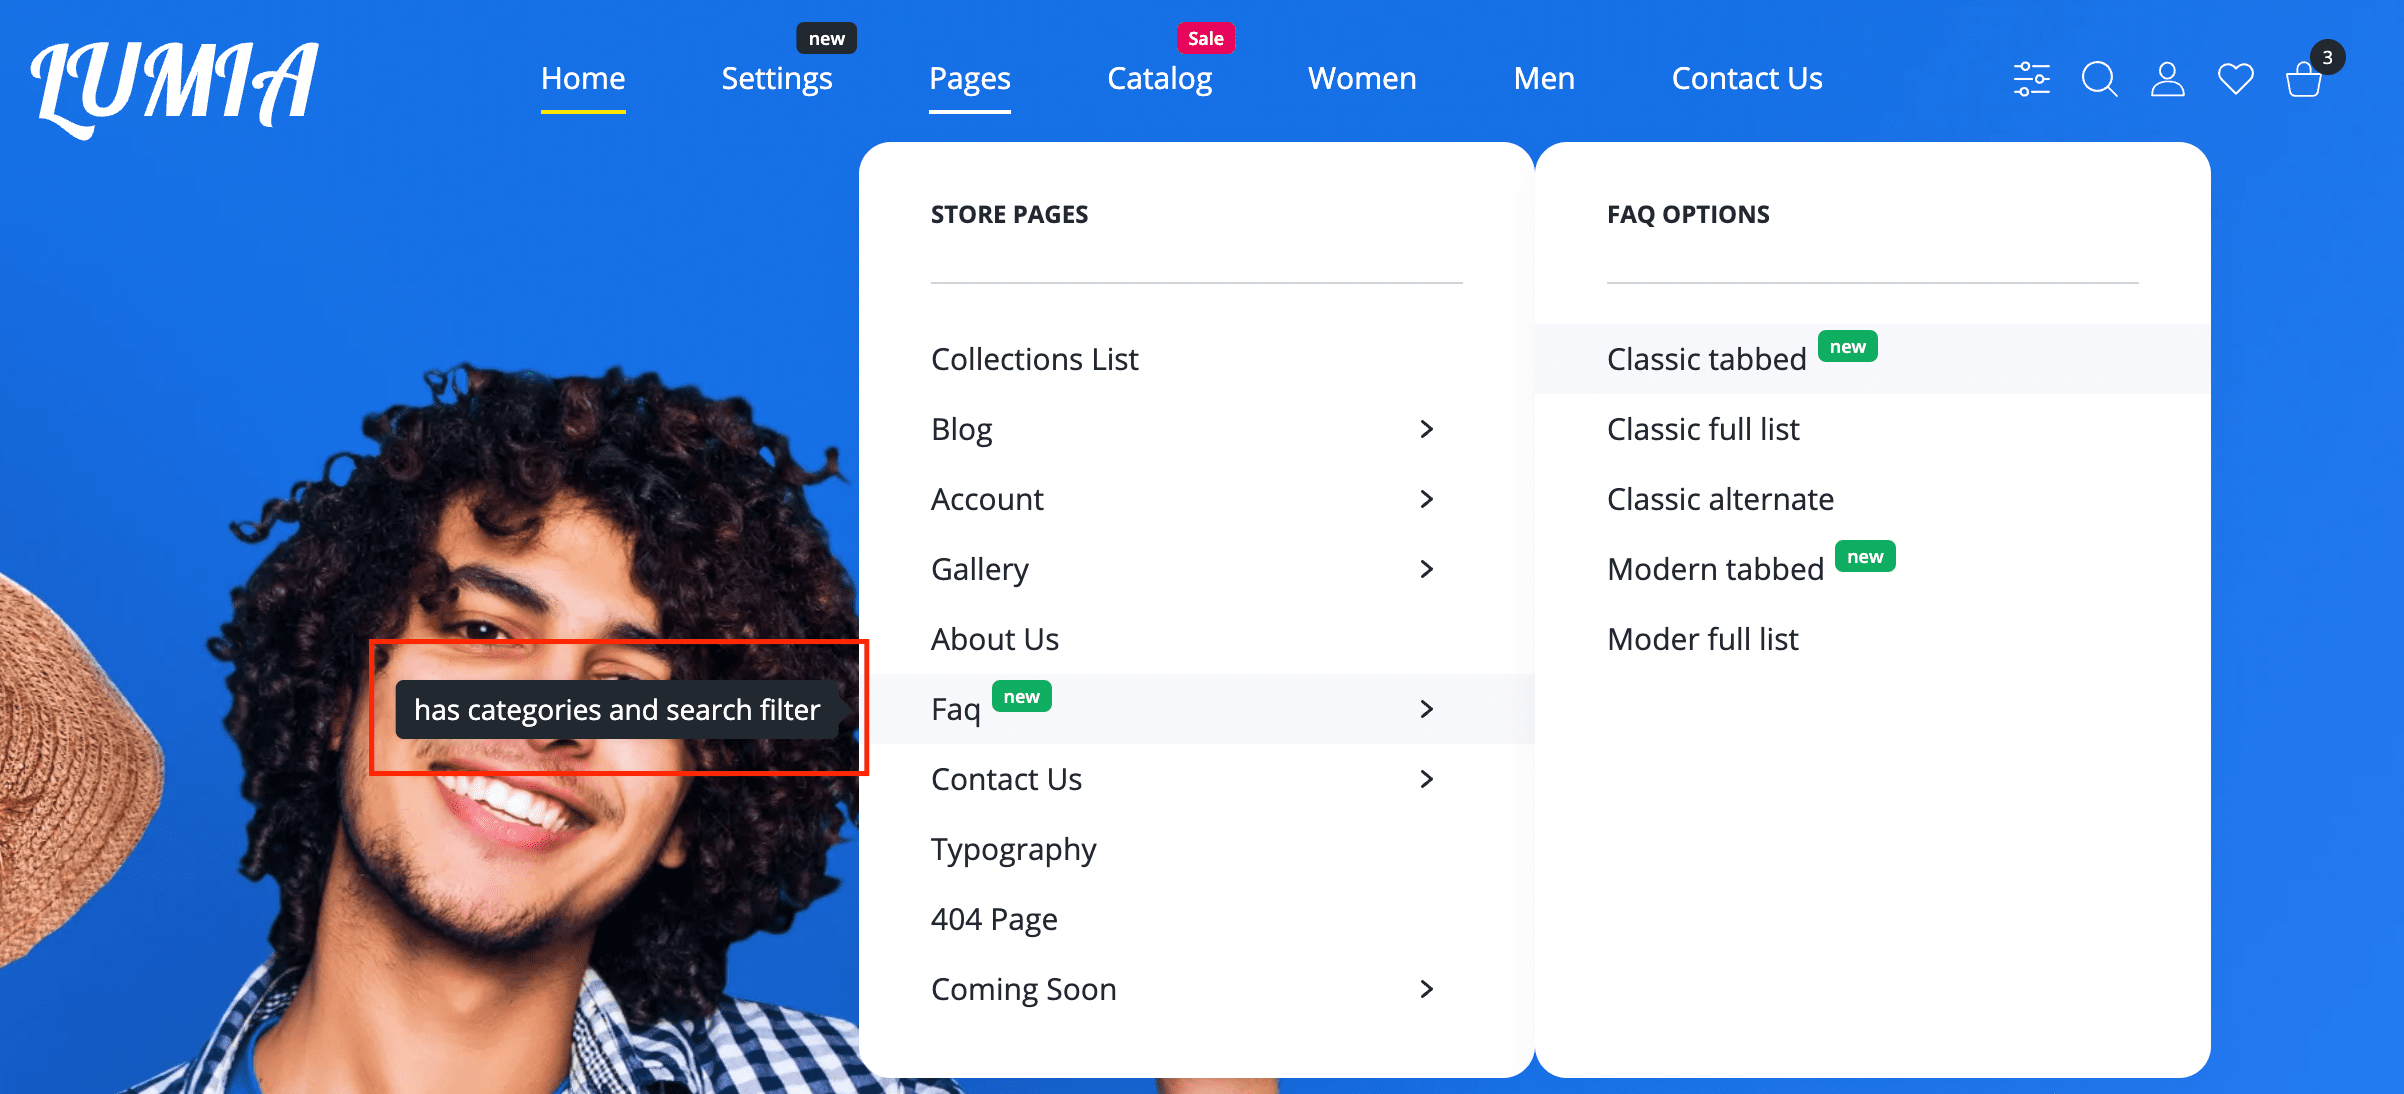
Text tooltip

Steps to enable
- From your Shopify admin, go to Online Store > Navigation ↗ (opens in a new tab).
- Click the name of the menu that includes the item.
- In the Menu items section, click Edit beside the name of the item.
- You need to add a pseudo element in the end of Name field:
|tooltip:My text tooltip- Click Apply changes.
- Click Save menu.
Example from our demo
Pages > Faq menu item.


Faq|subtitle:Faq options|badge:new|badge-color:4|tooltip:has categories and search filter
Image tooltip


Steps to enable
- From your Shopify admin, go to Online Store > Navigation ↗ (opens in a new tab).
- Click the name of the menu that includes the item.
- In the Menu items section, click Edit beside the name of the item.
- You need to add a pseudo element in the end of Name field:
|preview:absolute_image_pathabsolute_image_path is a path to the image that you must upload to the Shopify cdn server (from your Shopify admin, go to Settings > Files > Upload files)
- Click Apply changes.
- Click Save menu.
Example from our demo
Home menu item.

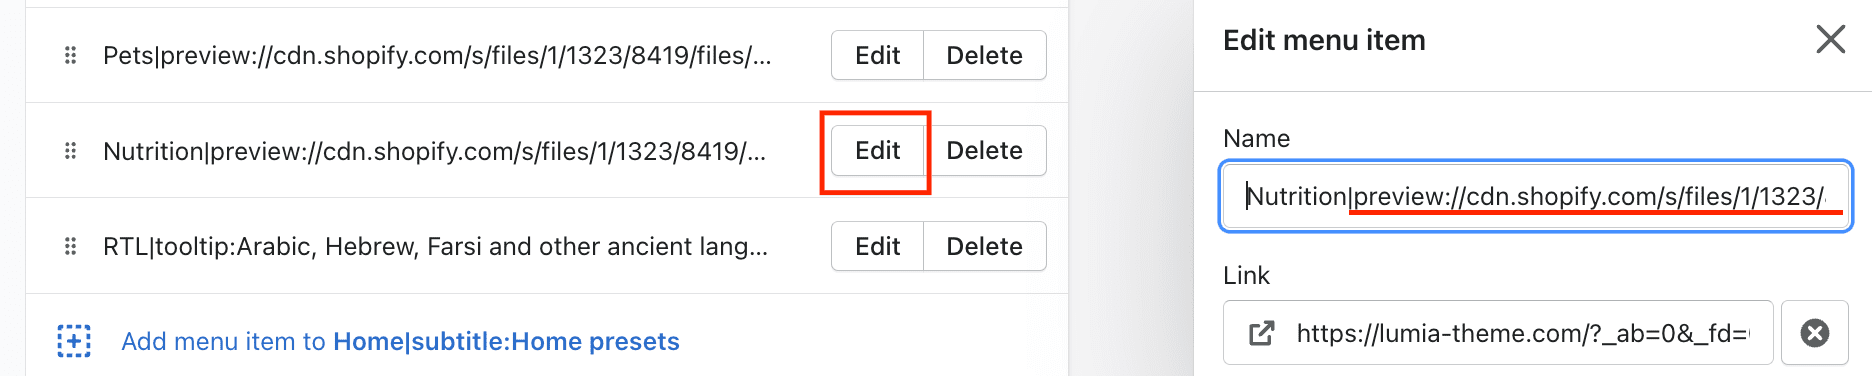
Nutrition|preview://cdn.shopify.com/s/files/1/1323/8419/files/skin-11-nutrition.png|padding:319|badge-color:1|badge:Dark|tooltip:Dark with contrast, Maturity and authority / Fitness equipment, Games store, Alcohol, Halloween Store (8 sections)|