Getting Started
Thank You for purchasing FOXic theme. If You have any questions that are beyond the scope of this documentation, please feel free to submit ticket to http://help.big-skins.com/ Thanks so much!
Best Regards from Bigsteps team!
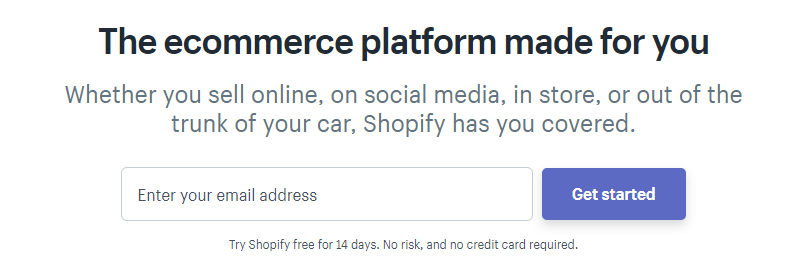
Why Shopify?
Shopify provides You with a variety of tools to help You set up and run Your business. Depending on the plan that You choose, You can find everything You need to showcase Your products online, to process payments, and to make Your store work for You. Shopify offers:
- Free and paid themes from the Shopify Theme Store to make Your store stand out and look great
- Free and paid apps from the Shopify App Store to expand on the existing functionality of Your store
- Shopify's own payment gateway to accept credit card payments
- Growth opportunities with Shopify's various sales channels as well an enterprise plan for merchants who are selling in high volume and might be feeling the effects of accumulating transaction fees
- A Shopify blog that has guides and articles about running Your store and connecting with Your customers
- Experts all around the world that can help You set up, design, and market Your store
Useful manuals
How to install Shopify?
Shopify is web based ecommerce software. This means there’s no installation required and it works with all operating systems (including Windows and MacOS)! Shopify hosts the site itself so You don’t have to worry about installing, upgrading or maintaining any software or web servers. Go here to install shopify
FOXic Installation & Update
1st - Make sure that You've installed shopify
2nd - You need to have the latest FOXic package from themeforest
Theme Install
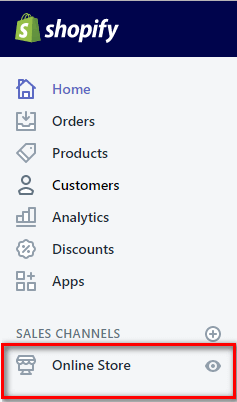
1. Login to Your shopify store. Go to Online Stores -> Themes.
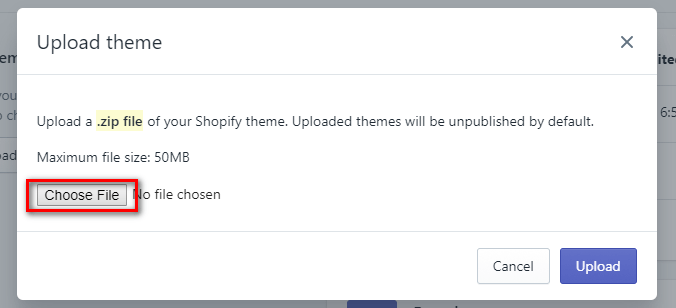
2. Click Upload Theme
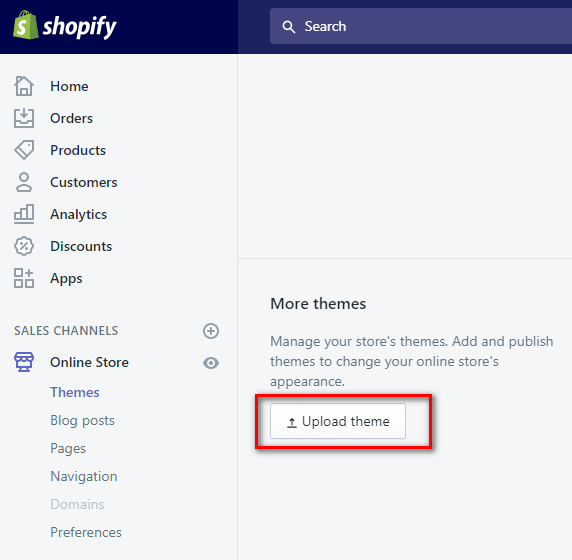
3. Browse local FOXic theme zip package and upload it
4. Click Publish
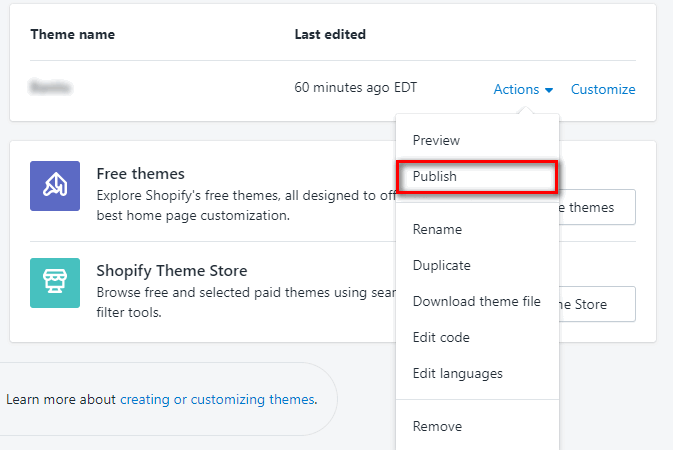
5. Congratulations! You have installed theme successfully! You can check it on the frontend of Your site.
Product reviews app
Shopify has no product stars and reviews tab by default:

That is why You have to install special FREE reviews app Product Reviews
Currency Setup
From official documentation:Set up Shopify Payments to use multiple currencies
- From your Shopify admin, go to Settings > Payment providers.
- In the Shopify Payments section, click Manage.
- In the Multiple currencies section, enable the currencies that you want to support from the list of accepted currencies.
- Click Save.
Set Your customer account preferences
You can make customer accounts required or optional, or disable them altogether. Keep in mind that requiring customers to create accounts might decrease sales conversions.
To edit Your customer account settings:
- From Your Shopify admin, click Settings, then click Checkout.
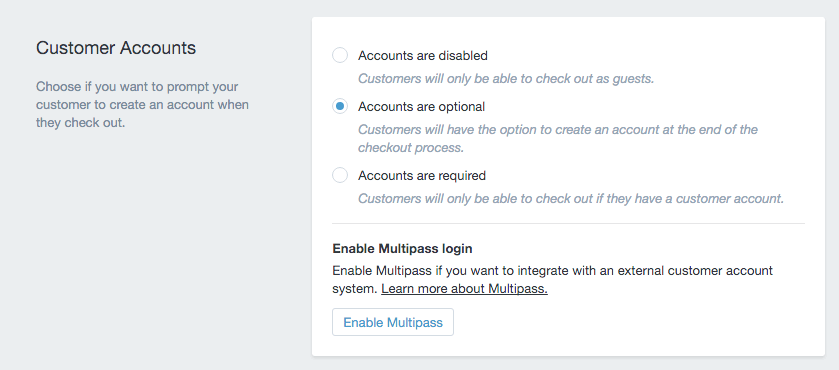
- In the Customer accounts section, choose a customer account option:
- Accounts are disabled.
Customers won't see the option to create an account or to login. They'll have to manually enter their details at checkout, because fields won't be pre-filled. - Accounts are optional - Choose this.
Customers can choose to create an account but it's not mandatory for checkout. If customers do have an account and they're logged in, their address fields are pre-filled when they place an order. - Accounts are required.
Customers must have an account and be logged in to place an order. This setting is useful if You're running a wholesale or members-only store, for example. Address fields are pre-filled when the customer places an order.
- Accounts are disabled.
- Click Save changes to confirm Your change to customer account settings.
Theme Update
In these files You will see smth like this:
|
1
2
3
4
5
6
7
8
9
10
11
12
13
14
15
16
17
18
|
Index: layout/theme.liquid===================================================================--- layout/theme.liquid (revision 109)+++ layout/theme.liquid (revision 110)@@ -17,12 +17,12 @@ <div class="page-wrapper"> {% include header %} <main class="page-main">- {% unless template == 'cart' and cart.item_count == 0 %}{% include 'breadcrumb' %}{% endunless %}+ {% unless template == 'cart' and cart.item_count == 0 %}{% unless template == '404' %}{% include 'breadcrumb' %}{% endunless %}{% endunless %} {{content_for_layout}} </main>- {% unless template == 'cart' and cart.item_count == 0 %}+ {% unless template == 'cart' and cart.item_count == 0 %}{% unless template == '404' %} {% include footer %}- {% endunless %}+ {% endunless %}{% endunless %} </div> |
That means that file layout/theme.liquid has been changed.
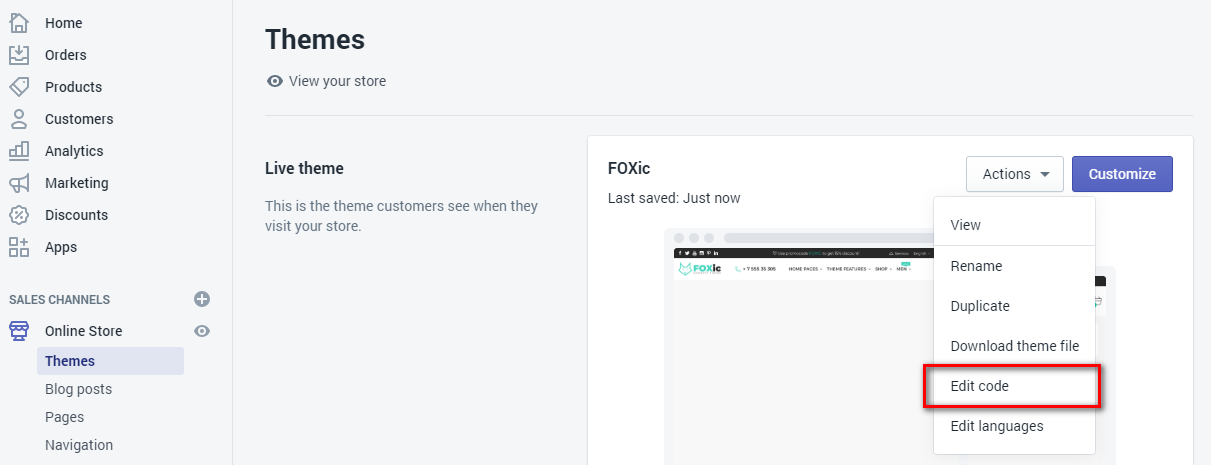
You need go to Shopify admin -> Online Stores -> Themes and click Edit Code
Click on file layout/theme.liquid in left sidebar
Go to diff file again:
|
1
2
|
- {% unless template == 'cart' and cart.item_count == 0 %}{% include 'breadcrumb' %}{% endunless %}+ {% unless template == 'cart' and cart.item_count == 0 %}{% unless template == '404' %}{% include 'breadcrumb' %}{% endunless %}{% endunless %} |
.. that means You need to replace the first string with the second one.
- remove the string
+ add the string
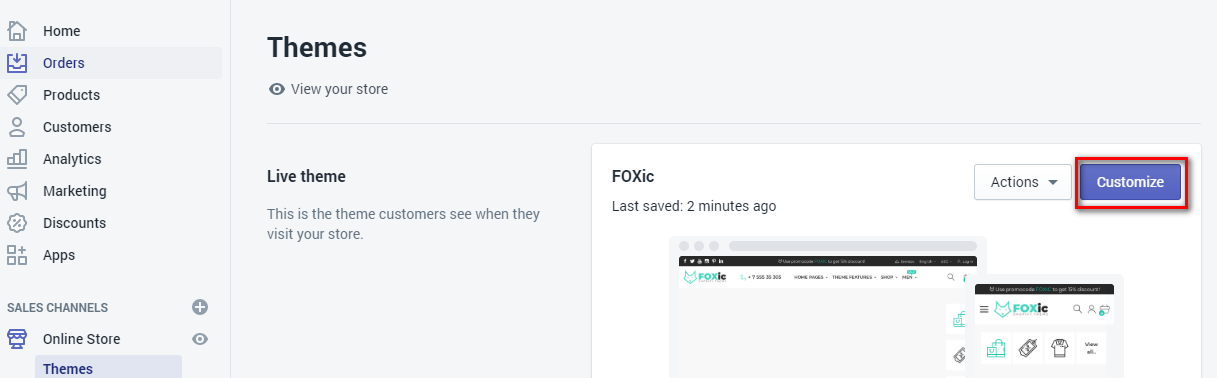
Theme Customization
There are 2 ways to customize the theme:
- Change theme settings
Go to Shopify admin -> Online Stores -> Themes -> Customize Theme
You will see a lot of theme settings You can change.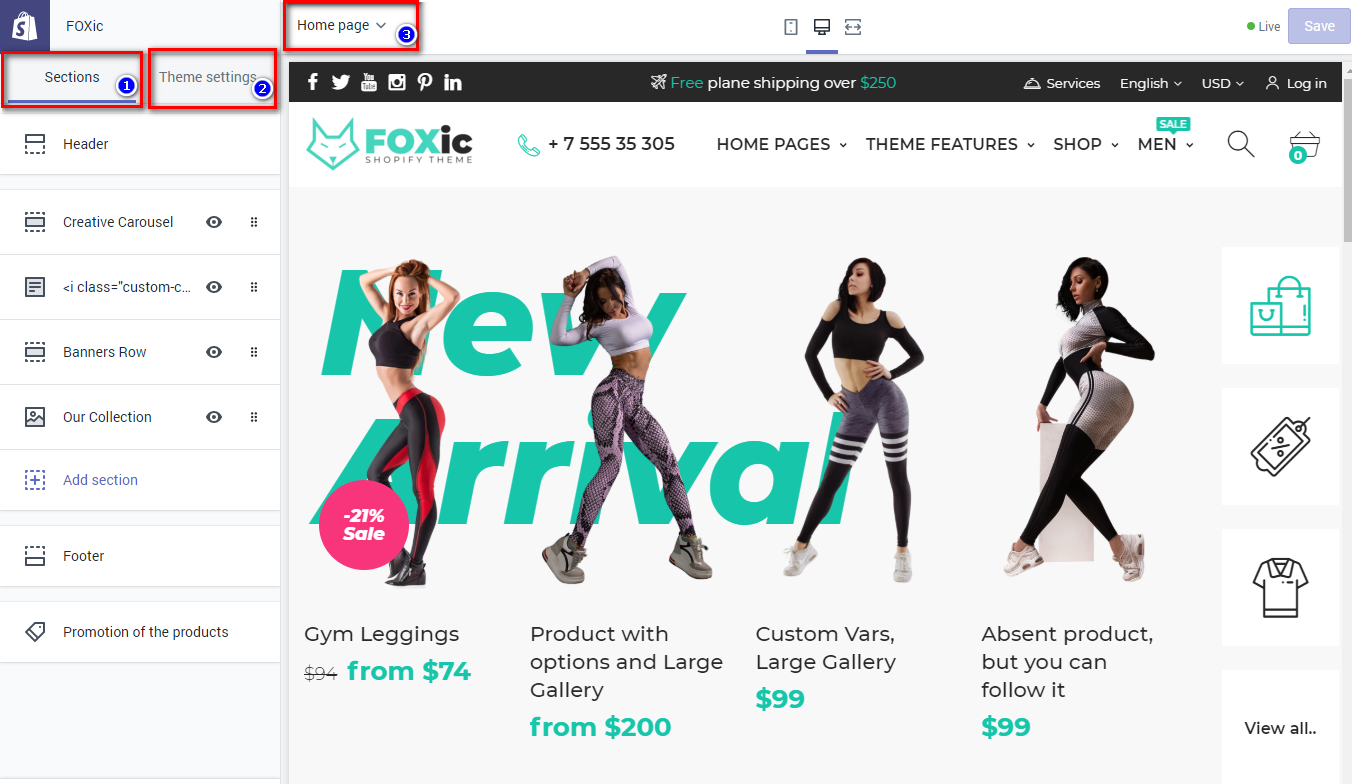
- Change theme files
You need go to Shopify admin -> Online Stores -> Themes and click Edit Code
How to add custom css?
Complicated customization of the theme requires style changes in css. The theme has main assets/style.css file. You can directly add own changes in that file, but it is a bad way for updates. It will be much easier in the future to simply replace an old style.css with a new updated style.css
That is why we have already created assets/custom.css file (write changes there)
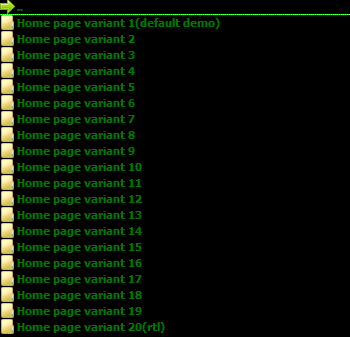
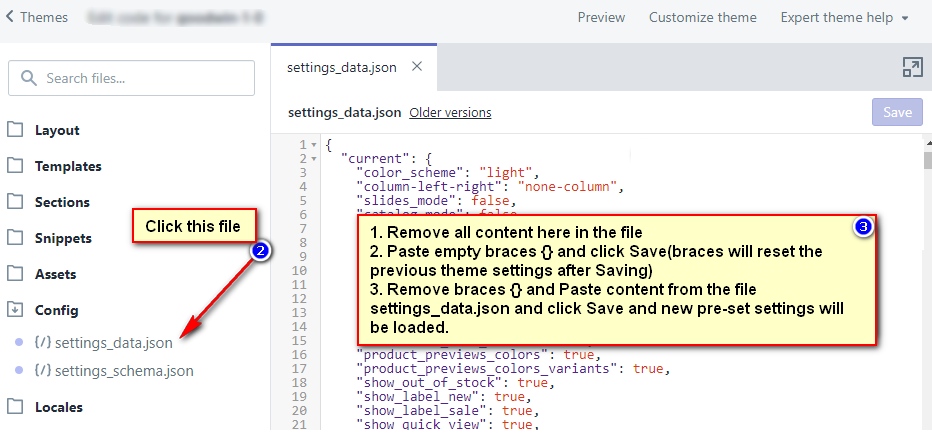
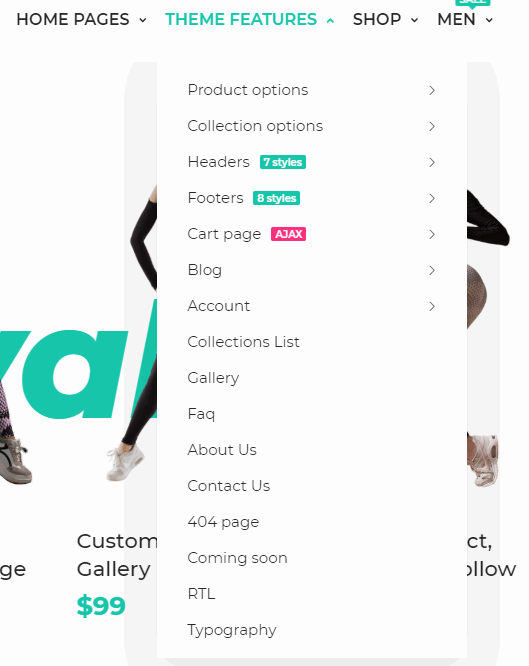
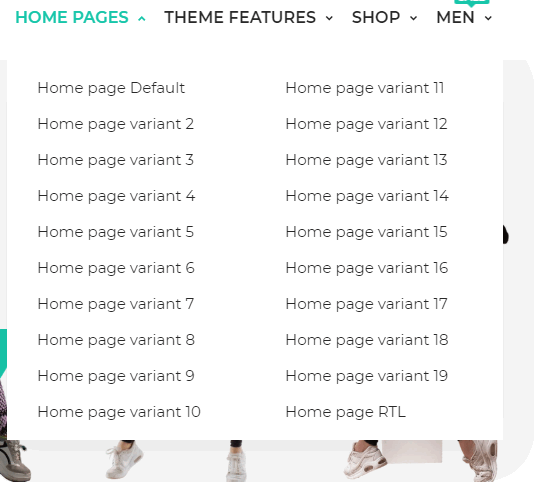
FOXic Home Pages
FOXic theme has pre-defined home pages:
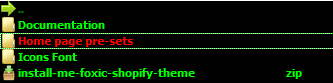
Steps to set up any Home page pre-set:
-
Go to the Theme package that you have downloaded from TF and open folder Home page pre-sets
-
Each folder has file settings_data.json, open it with any text editor
-
Copy content of the file settings_data.json and paste it in the uploaded theme file config/settings_data.json
Setup Navigation
Some of the main features of FOXic theme are the Header/Mobile Navigations.
You can use our sections constructor for creating an exclusive style with columns or simple dropdowns, previews etc OR simply for assigning navigation that you have created before. We enable you to choose the megamenu constructor or using default shopify navigation (for example if you want to use simple dropdowns and you have already created navigation).
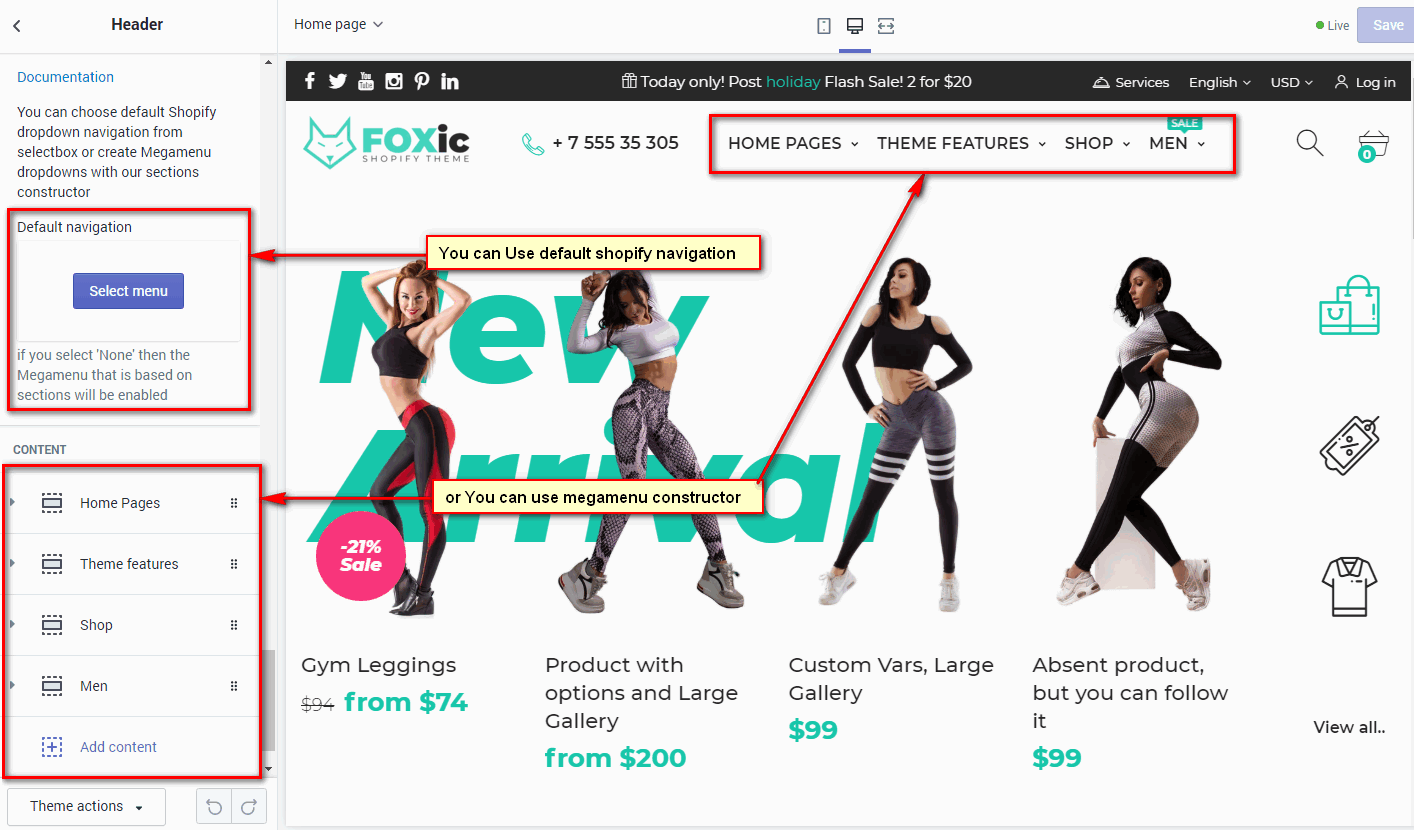
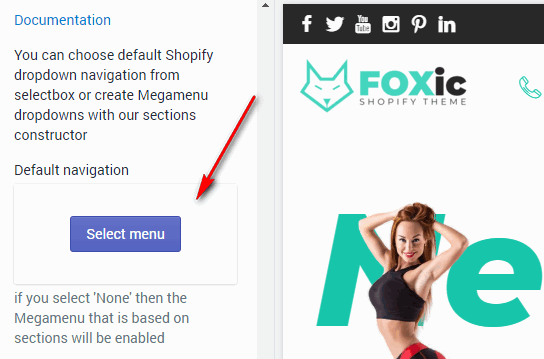
1. Default Shopify navigation usage
It is useful if you want to have a classic style with simple unlimited dropdowns and you don't want to re-write an old navigation just for the theme again. You can find the info on how to build the simple navigation with Shopify tools in the official source at https://help.shopify.com/en/manual/sell-online/online-store/menus-and-links/drop-down-menus
After having created the navigation successfully, you have to assign it in the header section
2. Megamenu usage based on the sections.
1. Select None in the default navigation.
2. You need to click in Header at the bottom 'Add content'
Next dropdown can be added by clicking 1
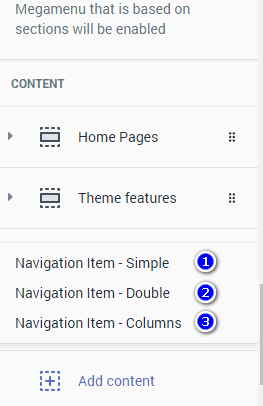
Next dropdown can be added by clicking 2
Next dropdown can be added by clicking 3
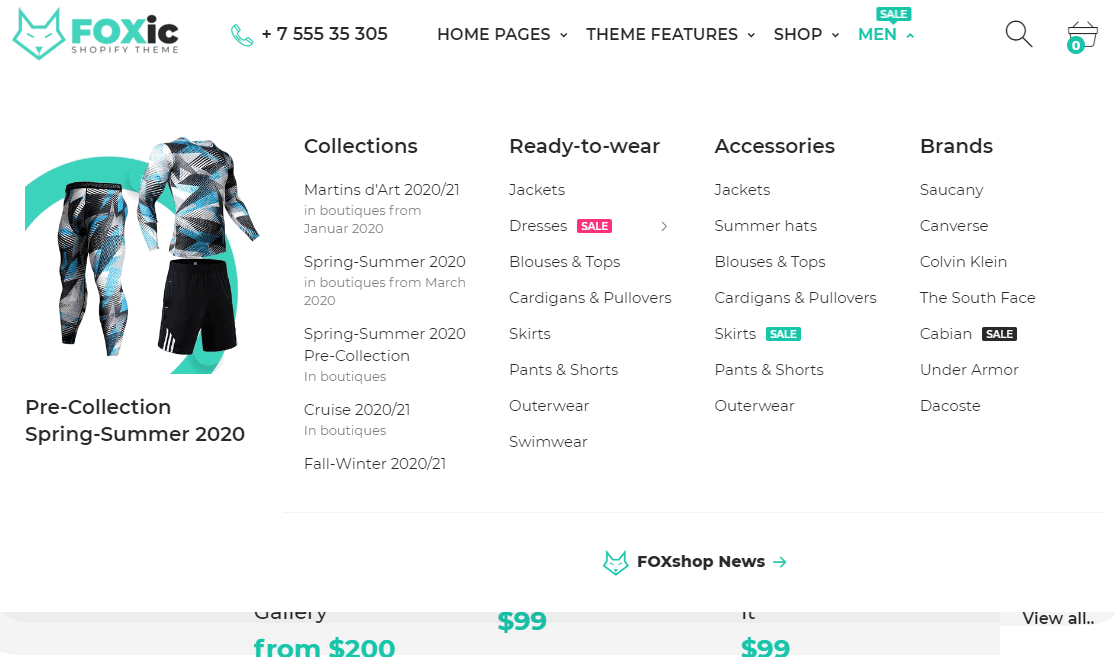
Megamenu allows you to add the left/right/top/bottom html contents.
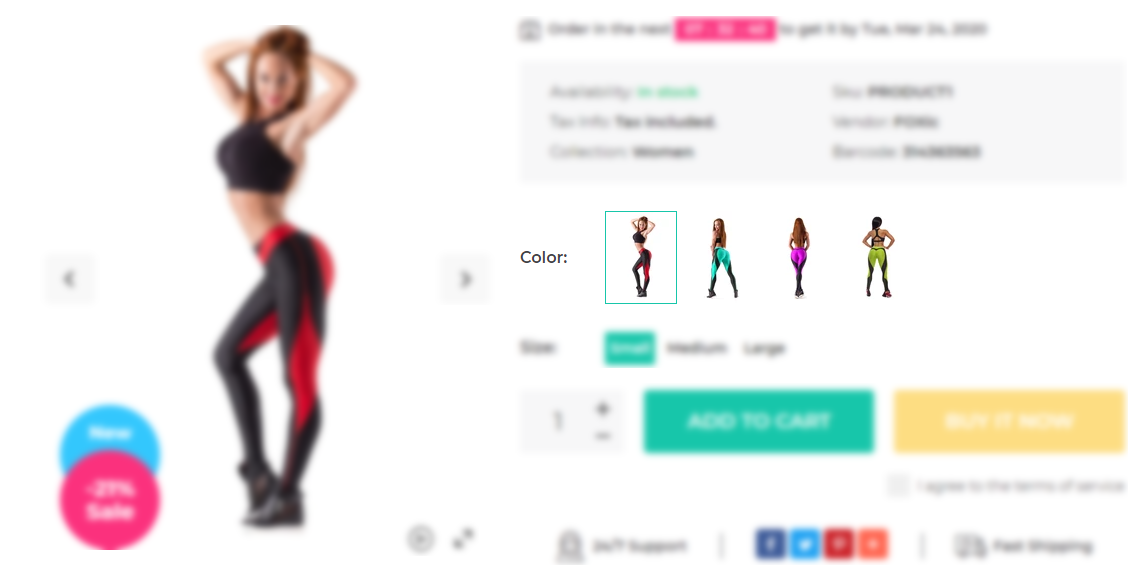
Product
You can read how to add/update the product in the official shopify article at https://help.shopify.com/manual/products/add-update-products
Unlike old Shopify, new Shopify product settings are visible when you click on some item in the right window(iframe).
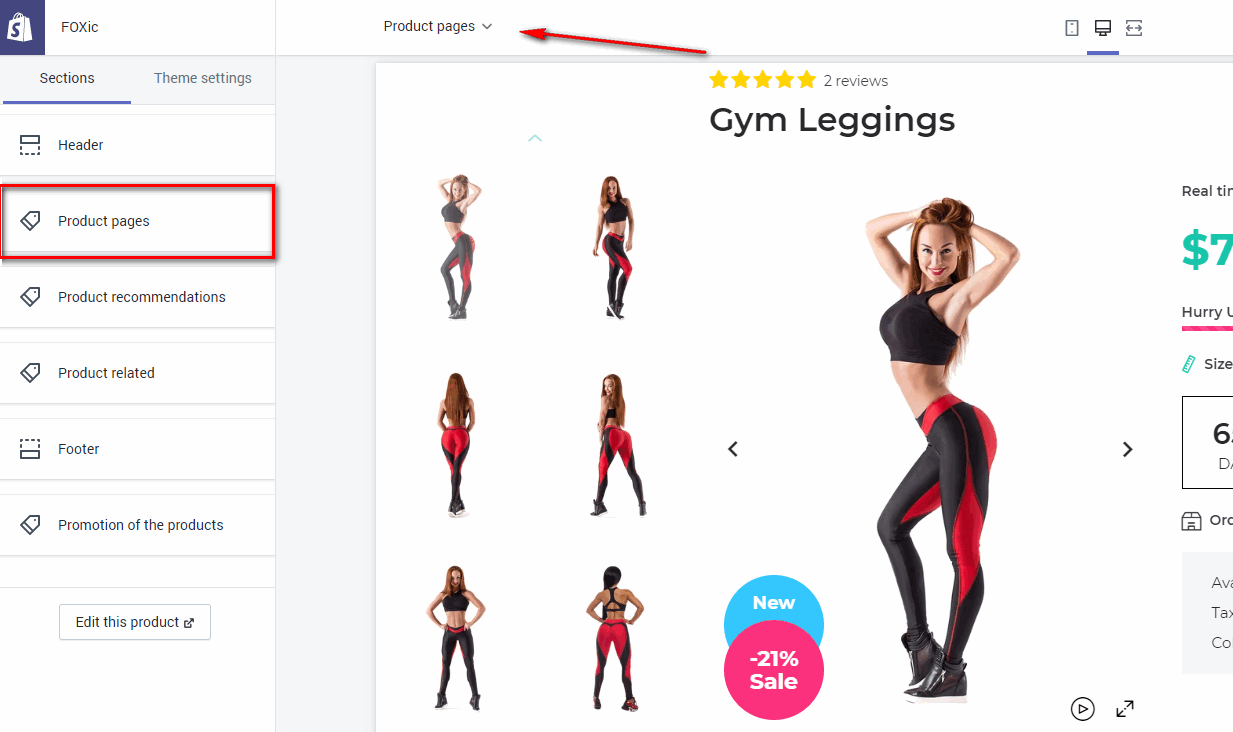
Following the latest trends in the market of online stores, our theme can be confifured in different ways. Some examples:
- Default
- 2xPreviews on the Right, Classic tabs under content
- 1xPreviews on the Left, Accordion tabs in content
- 2xPreviews on the Right , Classic tabs in content
- 2xPreviews on the Bottom, Accordion tabs under content, Boxed
- 1xPreviews on the Bottom, Boxed, Dropdown options
- 1xPreviews on the Right, Boxed
- Grid Previews, Classic tabs in content
- Color pic swatches
Product Countdown

Instead of pasting shortcodes like in many other themes directly in product content, we have decided to use the native Shopify tool - metafields. One of the main reasons was to separate bonus features from the product content area. Users often complain that there are strange shortcodes in the content of their products. Therefore, google rich snippets receive bad product content.
Steps to turn on the countdown of the product:
- If you haven't installed an app to work with shopify metafield yet then install Metafields Guru app to work with
- Open any product in the admin panel
- Open More Actions dropdown and click Edit Metafield
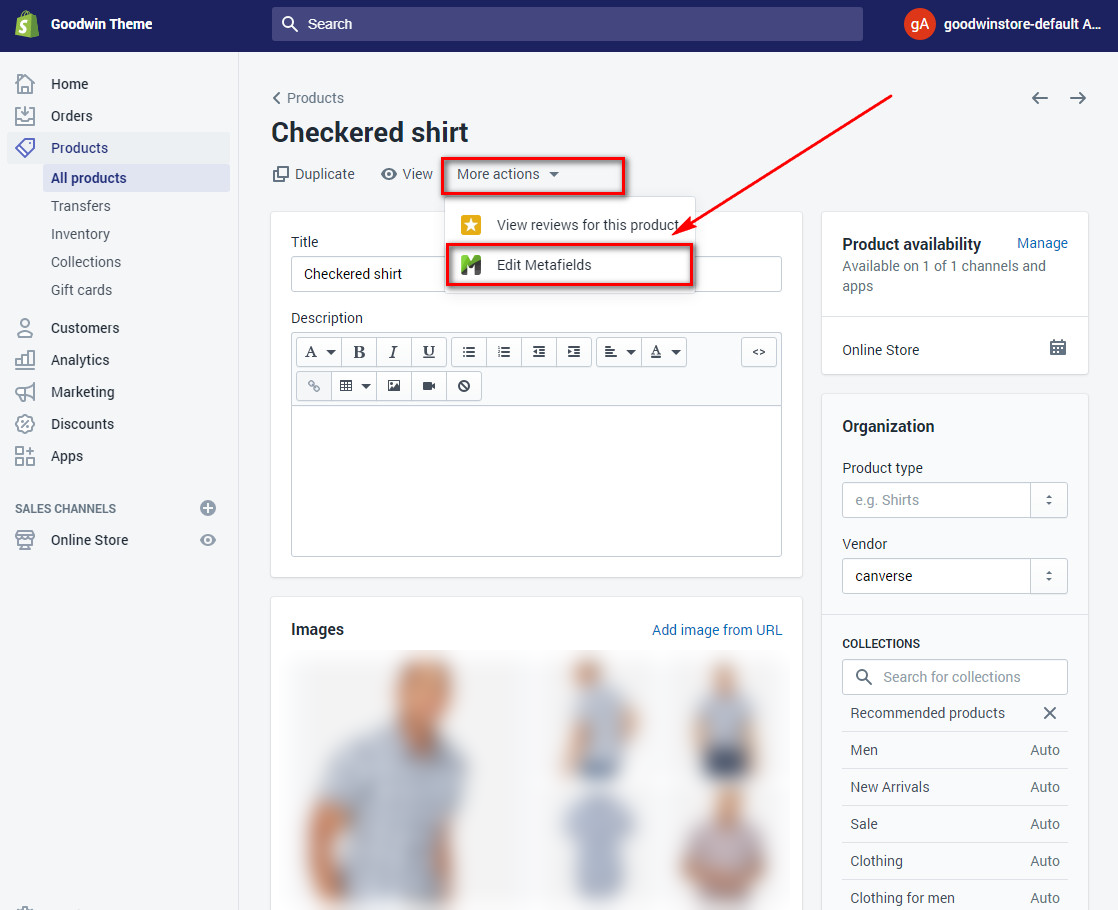
- Metafields Guru page for this product will be opened:
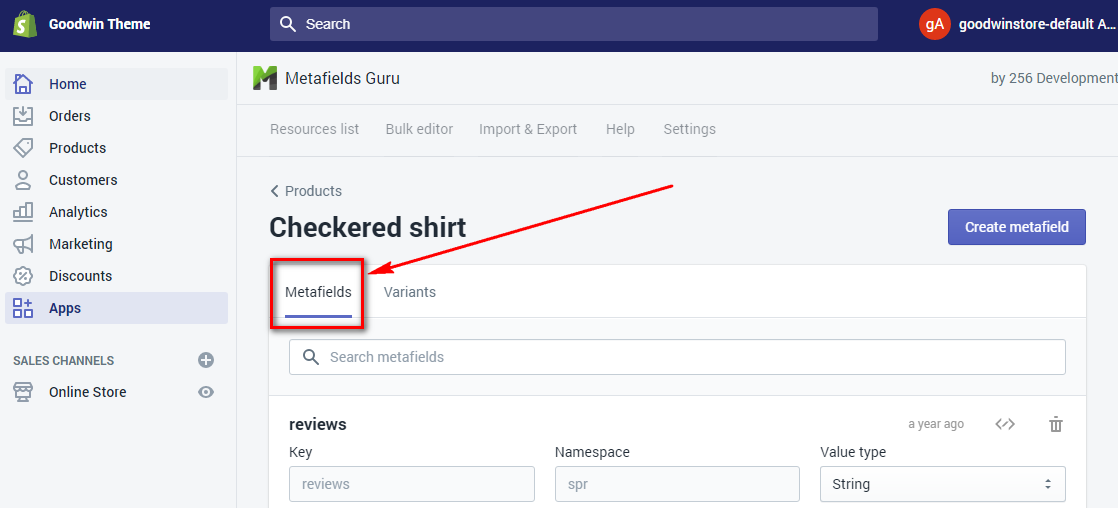
- Click Create Metafield button
-
- Fill c_f in the field 'namespace'
- Fill countdown in the field 'key'
- Fill 2019/12/31 in the content (bottom) field
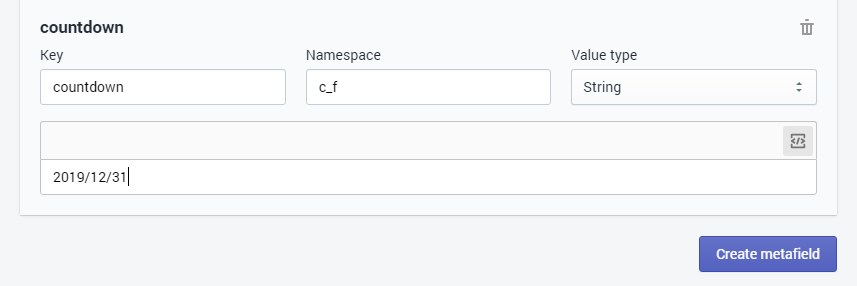
- Click Save button to save metafield
- Return to the product page
-
Fill the field 'Compare at price'
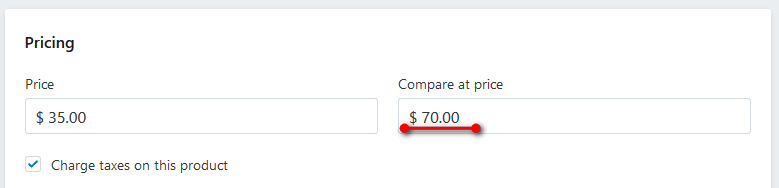
Important! If Compare Price is empty Countdown will not be shown
-
Apply the tag sale to the product to make the tags collection filter work accurately
New/Sale Labels
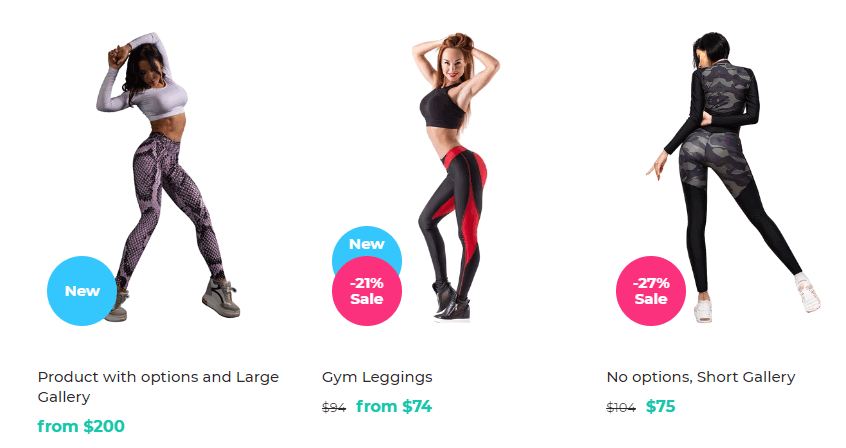
How to add a new label:
1. Go to Shopify admin -> Products -> Products
2. Choose any product and Click
3.Set product tag new
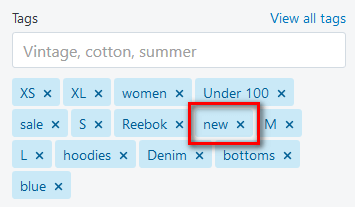
4. Click Save
How to add a sale label:
1. Go to Shopify admin -> Products -> Products
2. Choose any product and Click
3. Add Compare Price
4. Click Save
Product Video
FOXic theme supports mp4 / youtube video format.
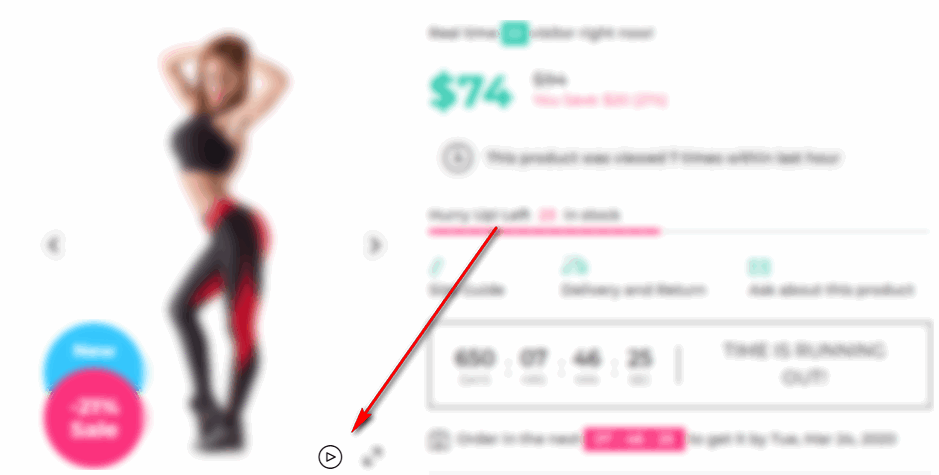
Instead of pasting shortcodes like in many other themes directly into product content, we have decided to use the native Shopify tool - metafields. One of the main reasons was to separate bonus features from the product content area. Users often complain that there are strange shortcodes in the content of their products. Therefore, google rich snippets receive bad product content.
Steps to turn on the video of the product:
- If you haven't installed an app to work with shopify metafield yet then install Metafields Guru app to work with
- Open any product in the admin panel
- Open More Actions dropdown and click Edit Metafield
- Metafields Guru page for this product will be opened:
- Click Create Metafield button
-
- Fill c_f in the field 'namespace'
- Fill video in the field 'key'
- Fill https://www.youtube.com/watch?v=_9VUPq3SxOc in the content (bottom) field
copy youtube url directly from browser address bar - * View source code button must be checked!

- Click Save button to save metafield
Product / Short Description
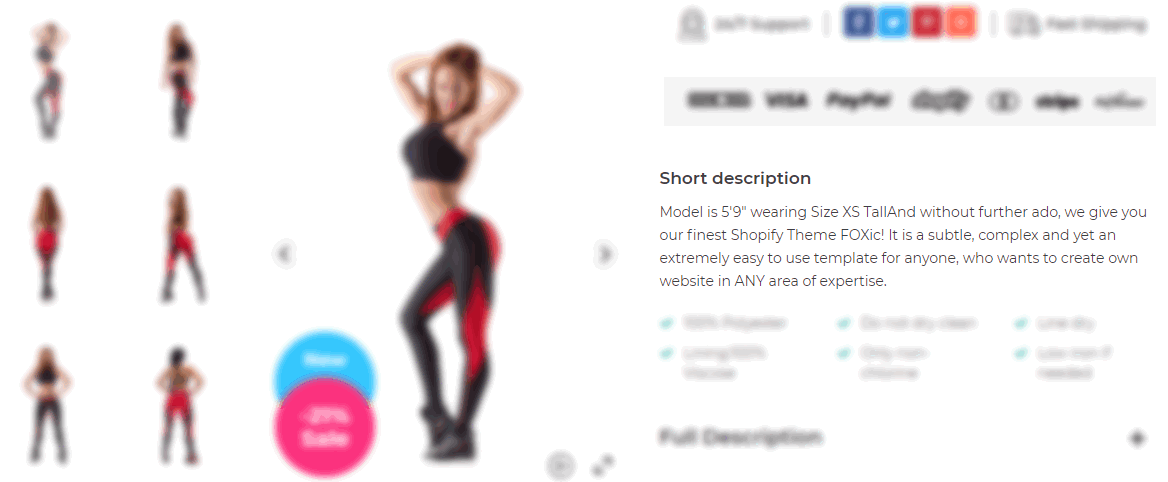
Instead of pasting shortcodes like in many other themes directly into product content, we have decided to use the native Shopify tool - metafields. One of the main reasons was to separate bonus features from the product content area. Users often complain that there are strange shortcodes in the content of their products. Therefore, google rich snippets receive bad product content.
Steps to turn on the description of the product:
- If you haven't installed an app to work with shopify metafield yet then install Metafields Guru app to work with
- Open any product in the admin panel
- Open More Actions dropdown and click Edit Metafield
- Metafields Guru page for this product will be opened:
- Click Create Metafield button
-
- Fill c_f in the field 'namespace'
- Fill introtext in the field 'key'
- Fill Neque porro quisquam labore in the field 'value'
also you can write any html/css here
- Click Save button to save metafield
Product Tabs
Unlike other themes this one have sections based tabs. It means that you can add/sort tabs as you want.
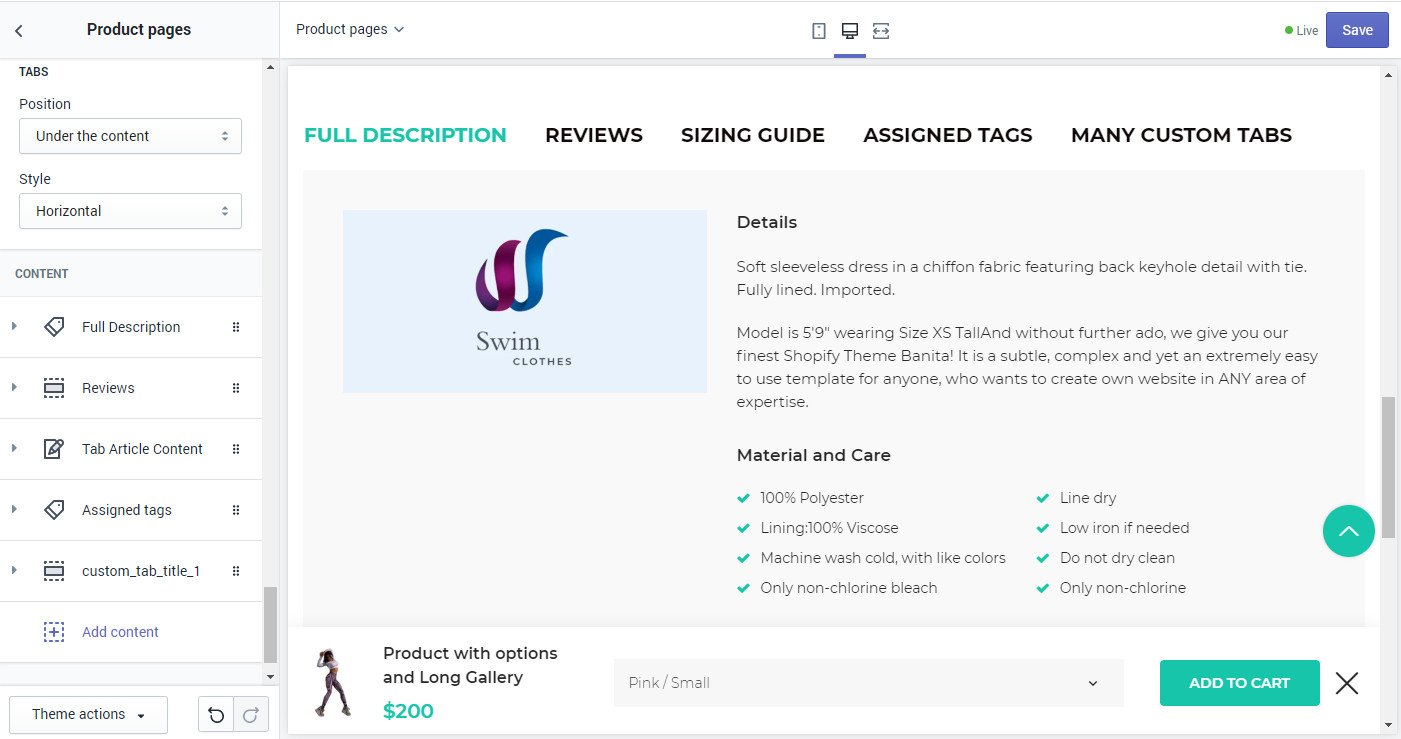
Also, You can make custom tabs for each product individually.
1. Click Add Content/Tab metafield:
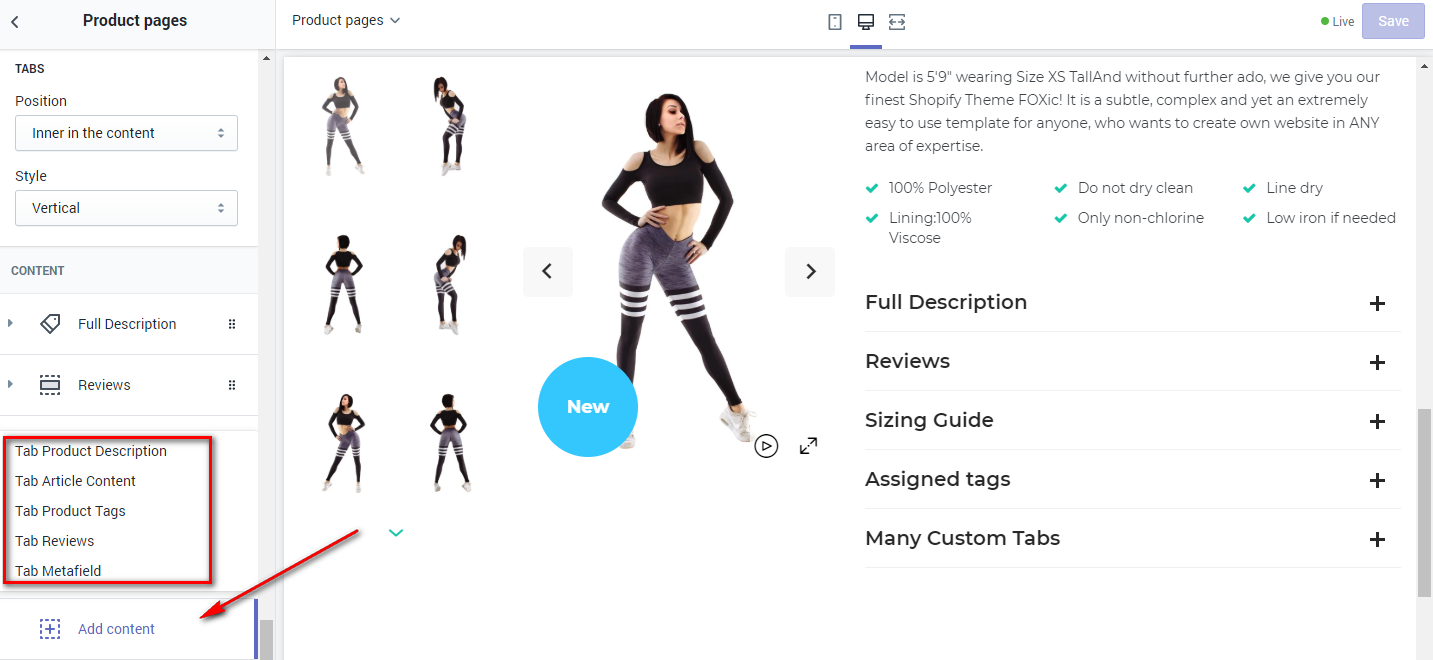
2. Choose any metafield from selectbox
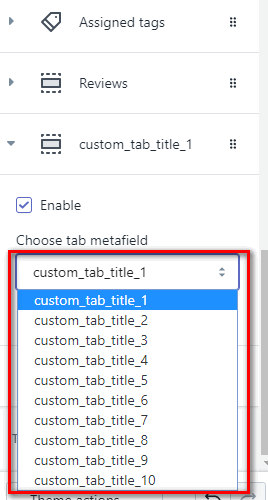
3. Fill values for choosed metafield
Steps to full values for custom tab metafields:
- If you haven't installed an app to work with shopify metafield yet then install Metafields Guru app to work with
- Open any product in the admin panel
- Open More Actions dropdown and click Edit Metafield
- Metafields Guru page for this product will be opened:
- Click Create Metafield button
-
- Fill c_f in the field 'namespace'
- Fill custom_tab_title_1 in the field 'key'
- Fill Custom Tab Title 1 in the content (bottom) field
key custom_tab_title_N, where N is integer number from 1 to 10
- Click Save button to save metafield
- Click Create Metafield button
-
- Fill c_f in the field 'namespace'
- Fill custom_tab_content_1 in the field 'key'
- Fill Content for Custom Tab 1 in the content (bottom) field
you can write any html/css here
key custom_tab_content_N, where N is integer number from 1 to 10
N for title and content must be the same
- Click Save button to save metafield
BONUS: If you want to disable all the tabs for certain product individually then fill in metafield with namespace/key/value c_f/notabs/yes
How to create colorized product
Product can be colorized only if it has a color option.
How to do it :
1. Go to Shopify admin -> Products
2. Choose any product and Click
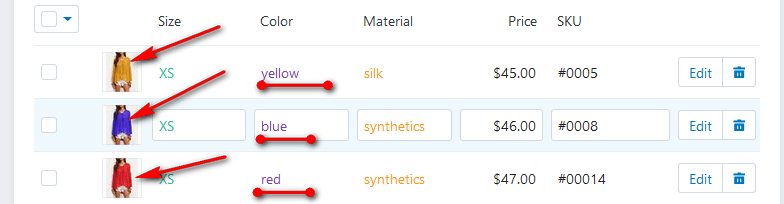
3. Add product variants
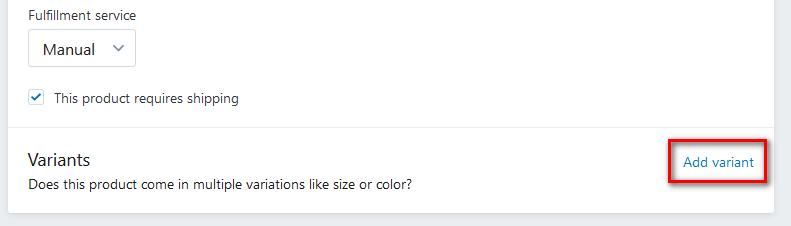
3. Change Size to Color or click Add another option (Color)

4. It is possible to add images for options once the option values have been saved.
5. Final step. Upload color pics.
Important! Save image name only in downcase format 'color-yourcolorname.png' (use symbol "-" in yourcolorname instead of spaces)
For example, You have color name in admin product option 'Dark Black', then upload color-dark-black.png
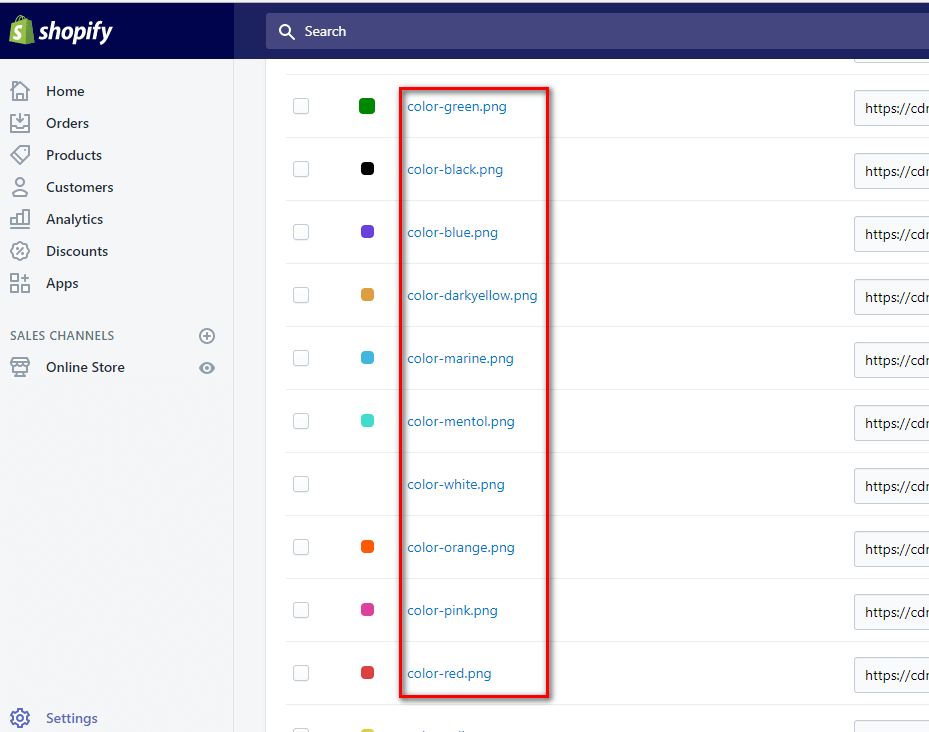
Important! Prefix color- is required! Use only PNG format.
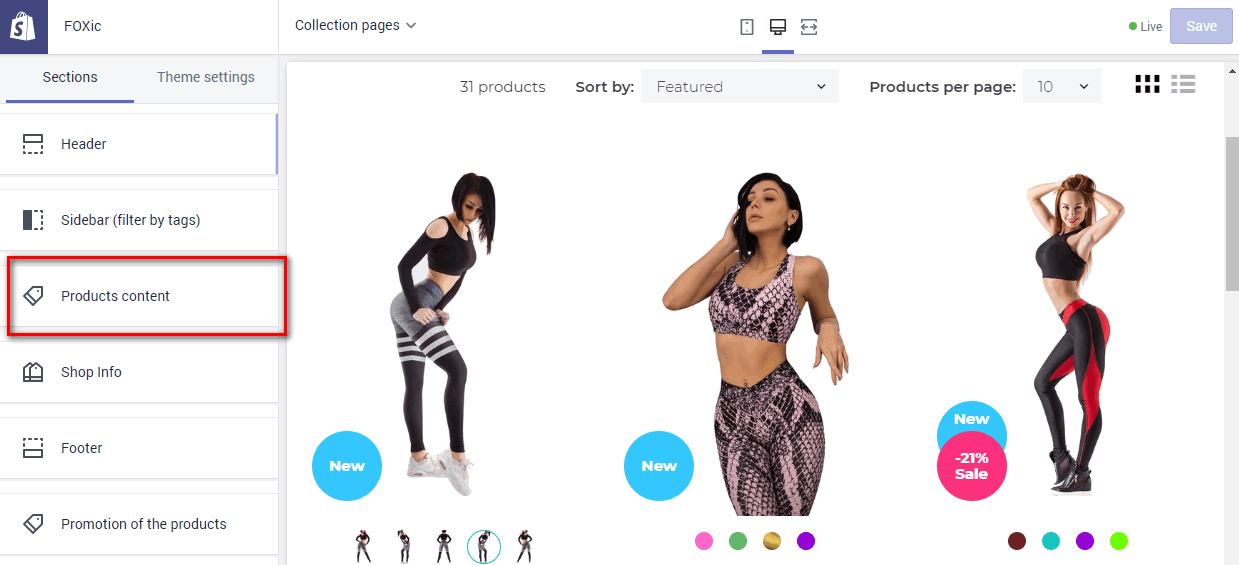
Collection
Real actions can corroborate our words when speaking about flexible collection
Useful features of FOXic's collection page:
- Collection is based on the sections
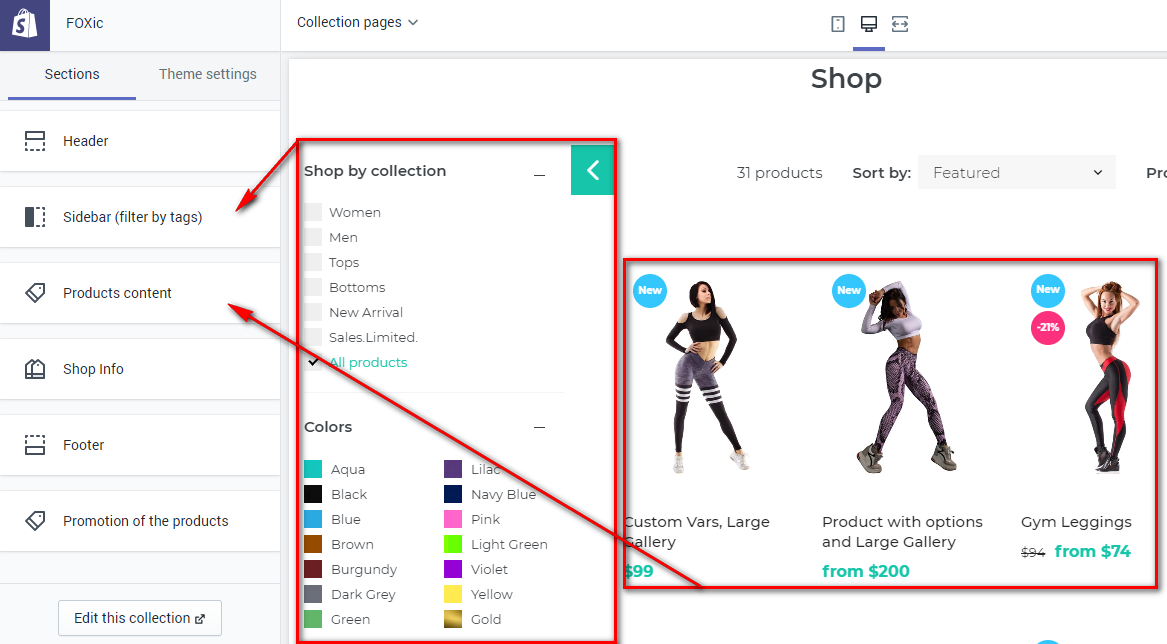
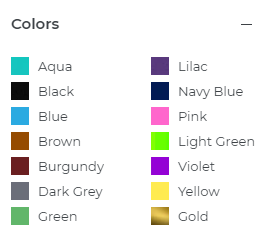
- Sidebar filter has UNLIMITED groups of filter tags. Each collection shows own set of filter groups (filter recognizes the tags assignment in the current collection).
Each filter group has four view styles:color pics, sizes, list
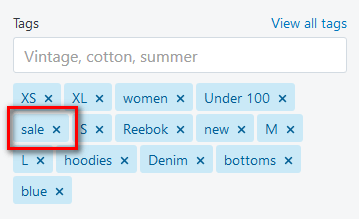
Setup sidebar filter
Sidebar filter is based on tags. Tags must be assigned for products according to own criteria.
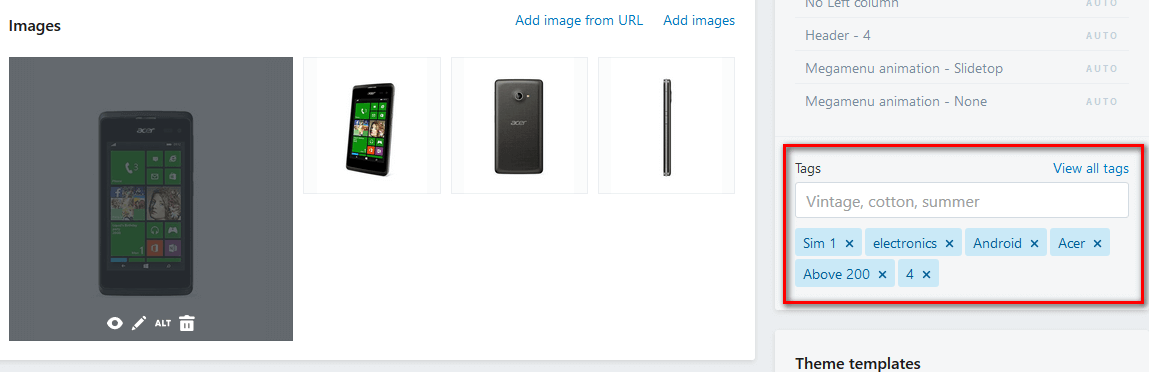
Product has tags:Sim 1, electronics, Andriod, Acer, Above 200, 4
If you click on some tag on sidebar filter the module starts to search for all products with the chosen tag.
Q:How sidebar filter divides into logic groups?
A:You have to do it yourself:
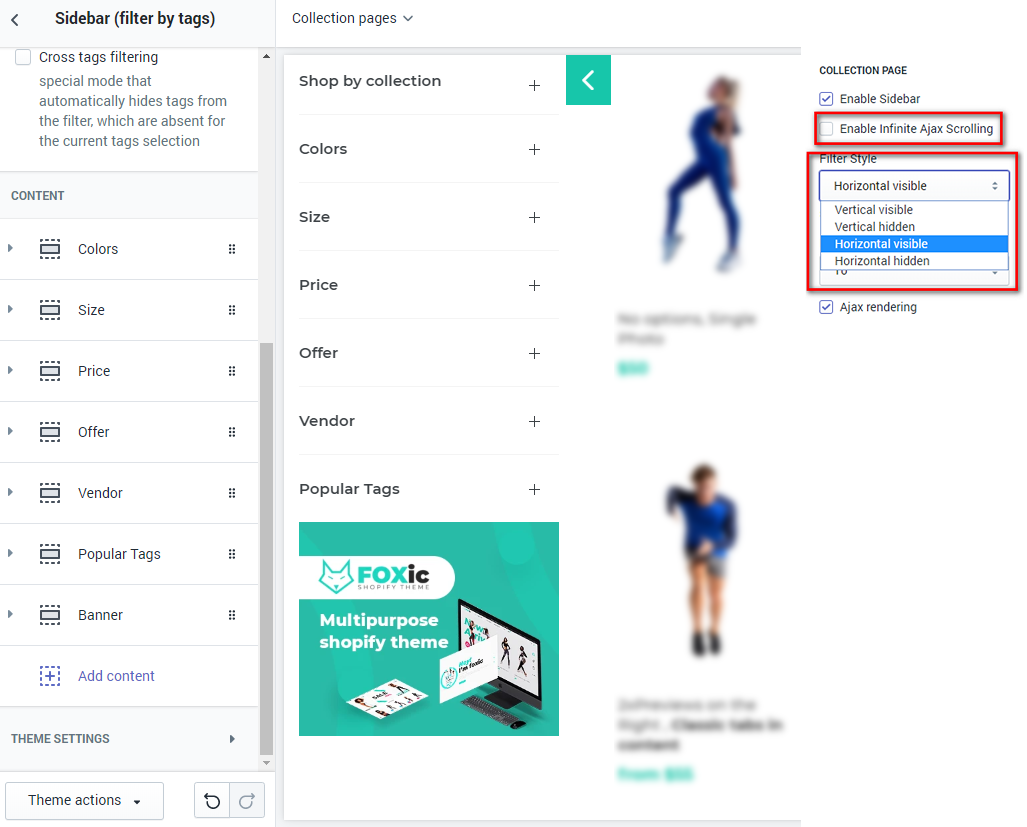
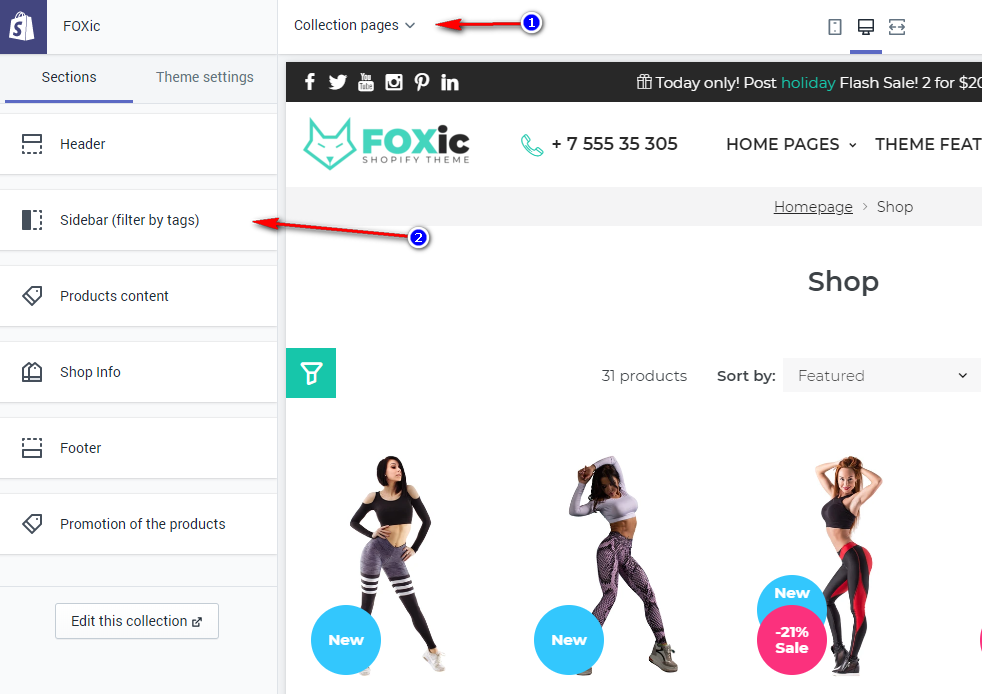
Go to Shopify admin -> Online Stores -> Themes -> Customize Theme -> Click on any collection link on window on the right
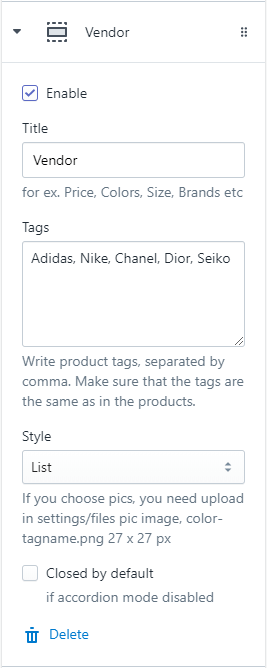
Add filter group

Example shown beneath has been made on demo in filter groups:
Available options for filter group:
- Enable - type checkbox. Default checked
- Title - type text. Title of the group
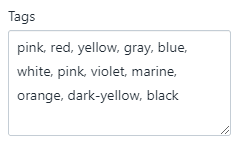
- Tags - type textarea. Tags, separated by comma
- Closed by default - type checkbox. Default unchecked. Is applicable only for NOT accordion mode.
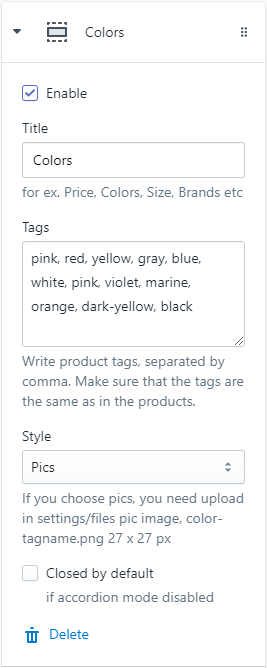
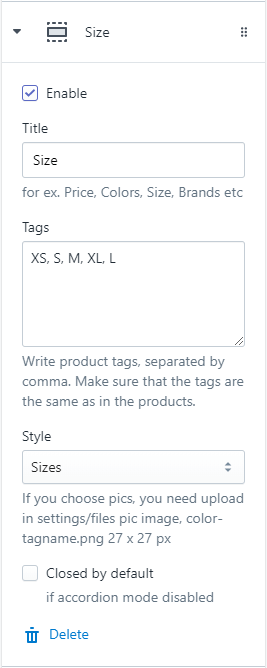
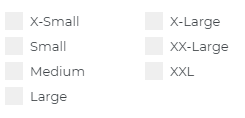
- Style - type selectbox. Available values: List(default) / Sizes / Pics / Tags
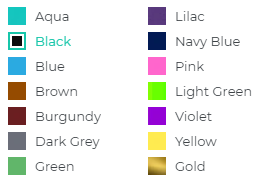
Color Pics
List
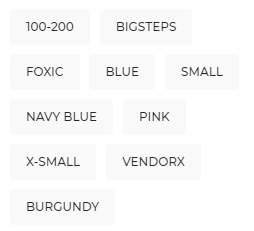
Tags
if you use Pics style you have to upload pics here Shopify admin -> Settings -> Files -> Upload Files
Upload special format of file name color-{{tagname}}.png
For example, You have filled the tags in the group: Black, yellow, Dark-blue. You need to upload files color-black.png, color-dark-blue.png, color-yellow.png with 25x25 px size
Collection Products Grid
Go to Shopify admin -> Online Stores -> Themes -> Customize Theme -> Click on any collection link in right window

Blog
Full info is available in the official shopify doc at https://help.shopify.com/manual/sell-online/online-store/blogs
Your Shopify store comes with a built-in blogging engine. Blogs are great for the content that you’ll be updating regularly. They’re also the best if you want to encourage the feedback under the blog. Choose to post on your store’s blog if you’re looking to create a discussion and build a community around your products and your brand.
Demo Example of FOXic Blog List + Sidebar
We have made useful options for the blog page and post page. Independent width for the blog/post. Enable/disable the sidebar for the blog/post, posts count per page.
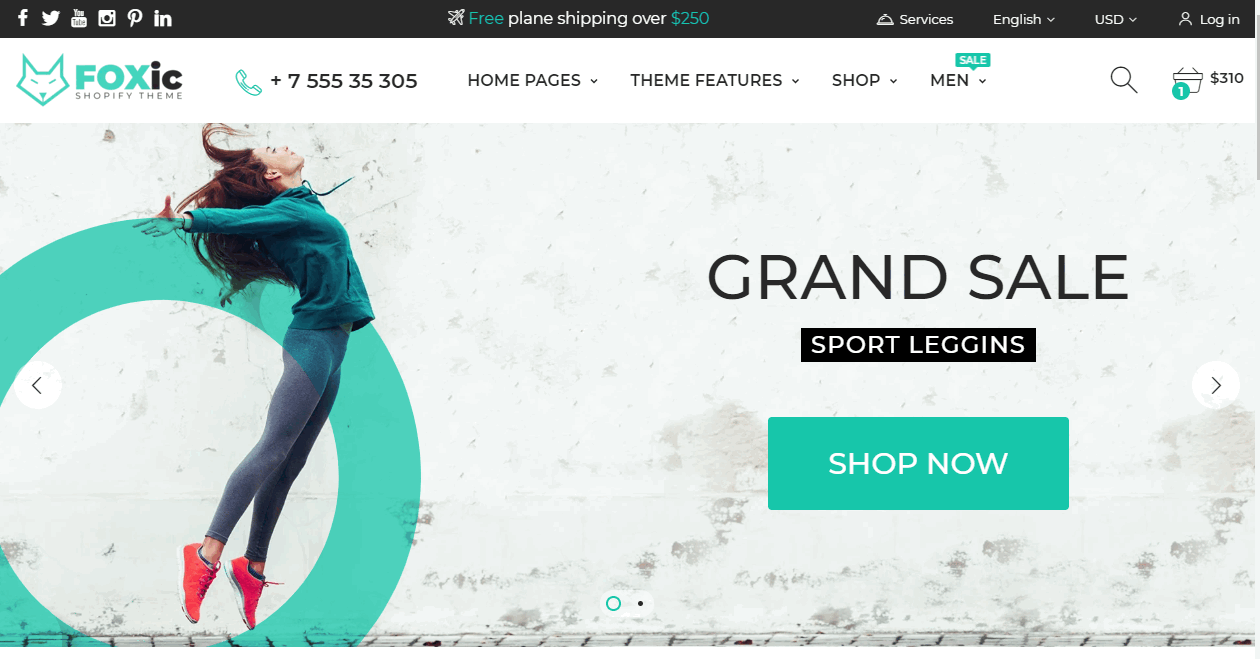
Slider
Create as many sliders per one page as you want and place them in any place of your home page content area.
Desktop preview
Mobile preview

You can discover an amazingly powerful section slideshow using our theme.
Our slider consists of animations, youtube videos, unlimited slides, height option, width option, a lot of options. Use your imagination and create the dream slider with easy-to-use tools on the admin panel. Or apply pre-defined slides from our demo.
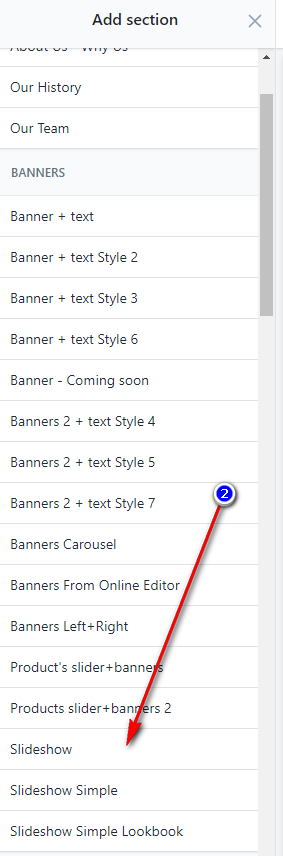
How to set up slider:
Add new section Slideshow
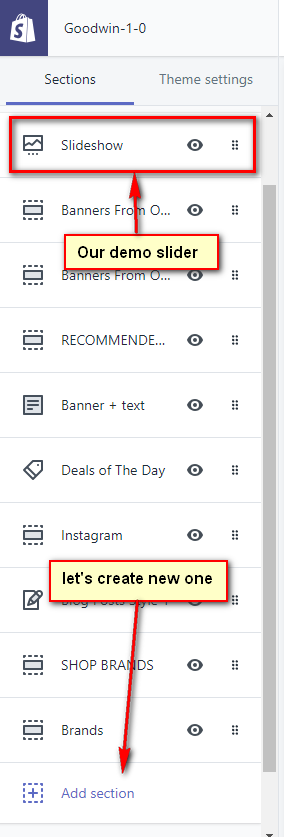
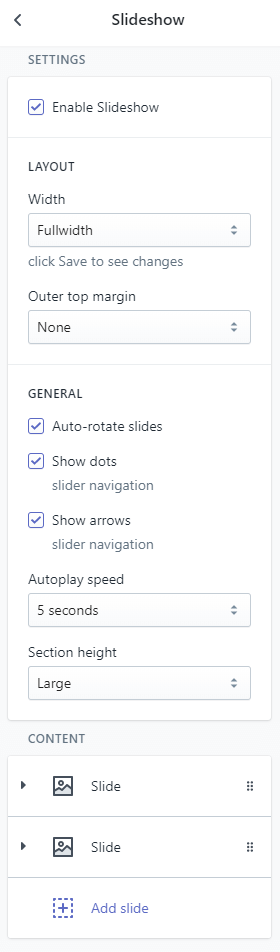
You can see general main settings of the slider such as width(fullwidth, boxed, global site width), auto-rotate, rotation speed, slider height (small, medium, fullheight)
Two demo slides are created automatically. You can remove them or alter.
How to set up slide:
Click Add slide

For example, we have uploaded slides 1920x820 px in our demo
Background video without play button

Create Contact Us page
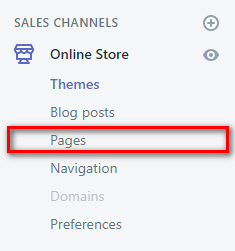
1. Login to Your shopify store. Go to Online Stores -> Pages.
Next
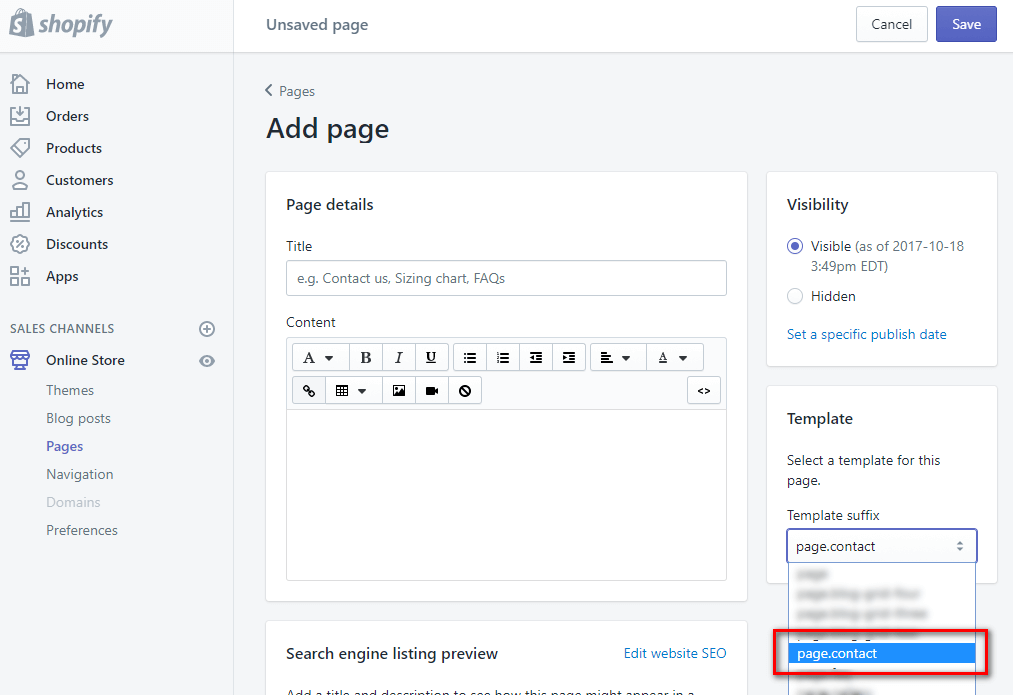
2. Click Add page

3. Choose template page.contact, write Page Title Contact Us and click save
Click Save
You have created your 'Contact Us' page. You can add the Contact page to any navigation.
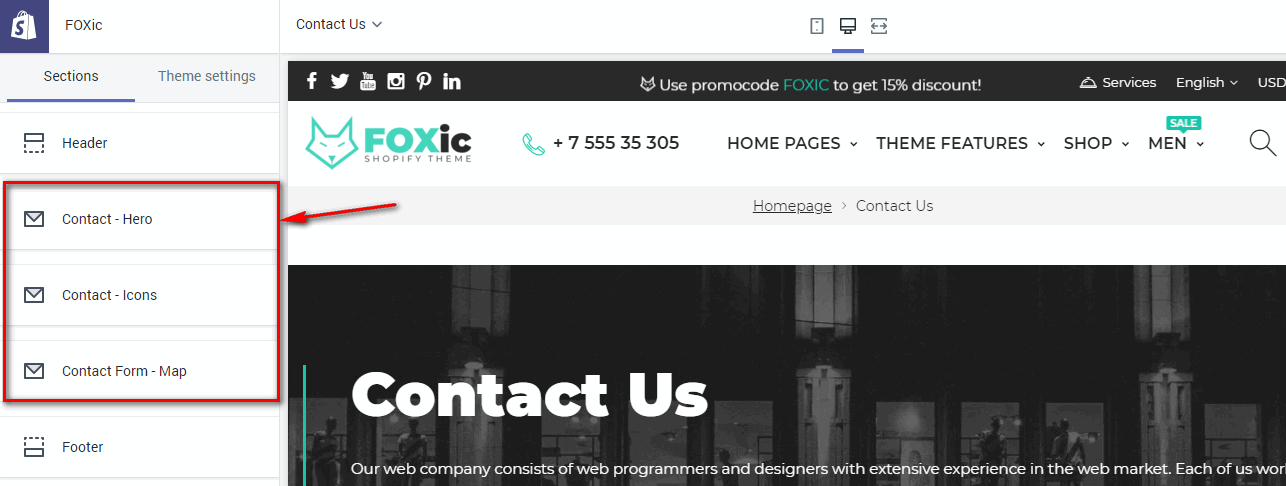
Next step edit Contact Page:
1. Go to Online Store
2. Click Customize
3. Find and click Contact us from navigation
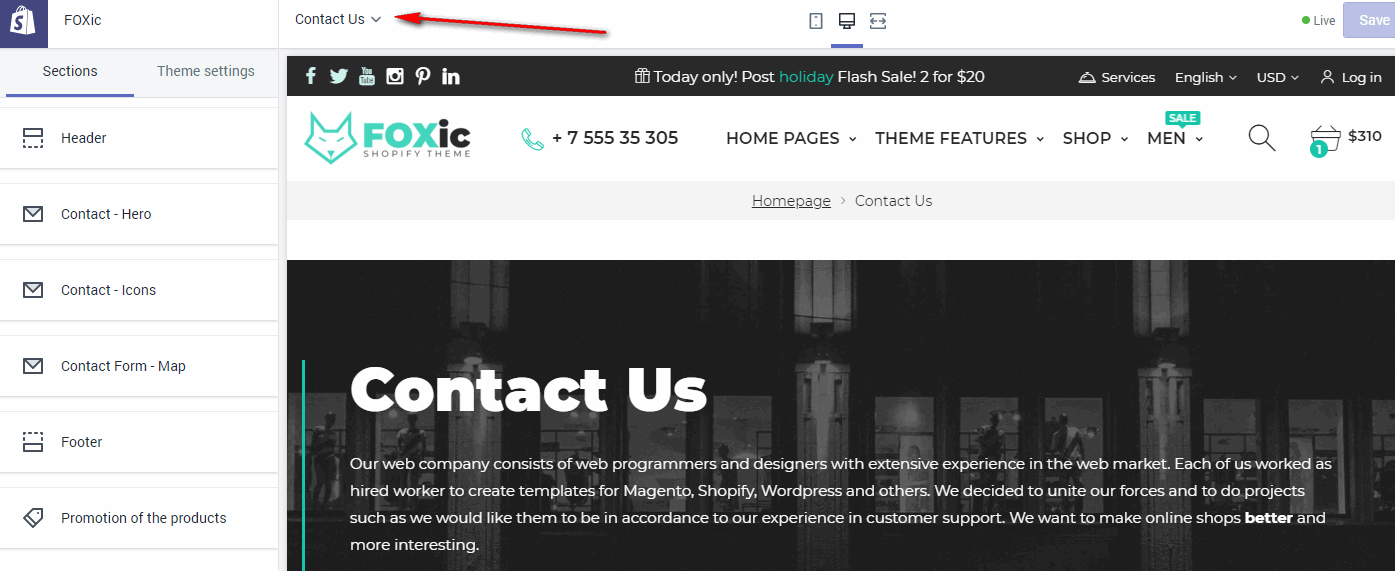
4. Edit Contact us section
Create About Us page
1. Login to Your shopify store. Go to Online Stores -> Pages.
Next
2. Click Add page
3. Choose template page.about-us, write Page Title About Us and click save
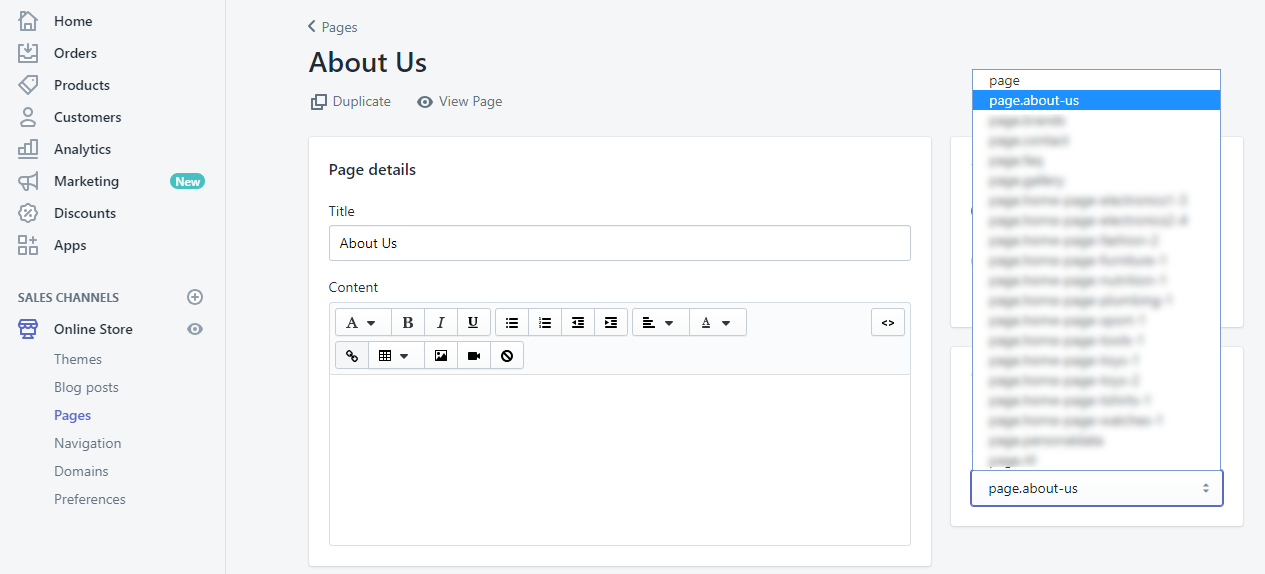
Click Save
You have created your 'About us' page. You can add the 'About us' page to any navigation.
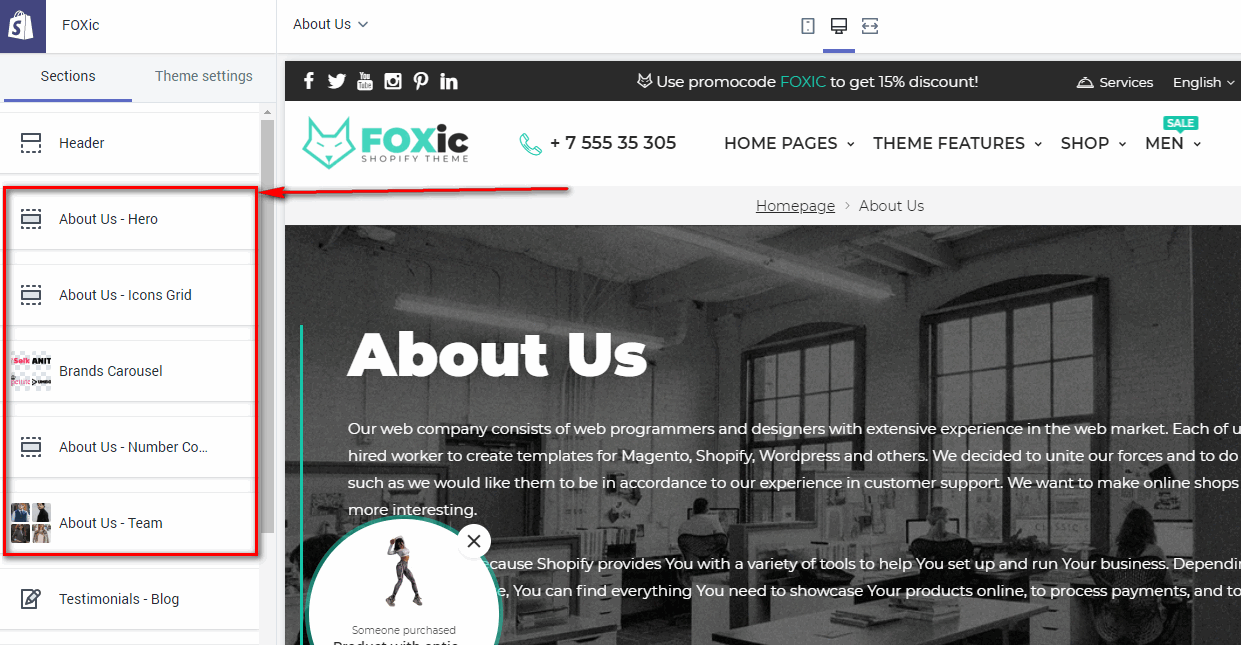
Next step edit 'About us' page:
1. Go to Online Store
2. Click Customize
3. Find and click About Us from navigation
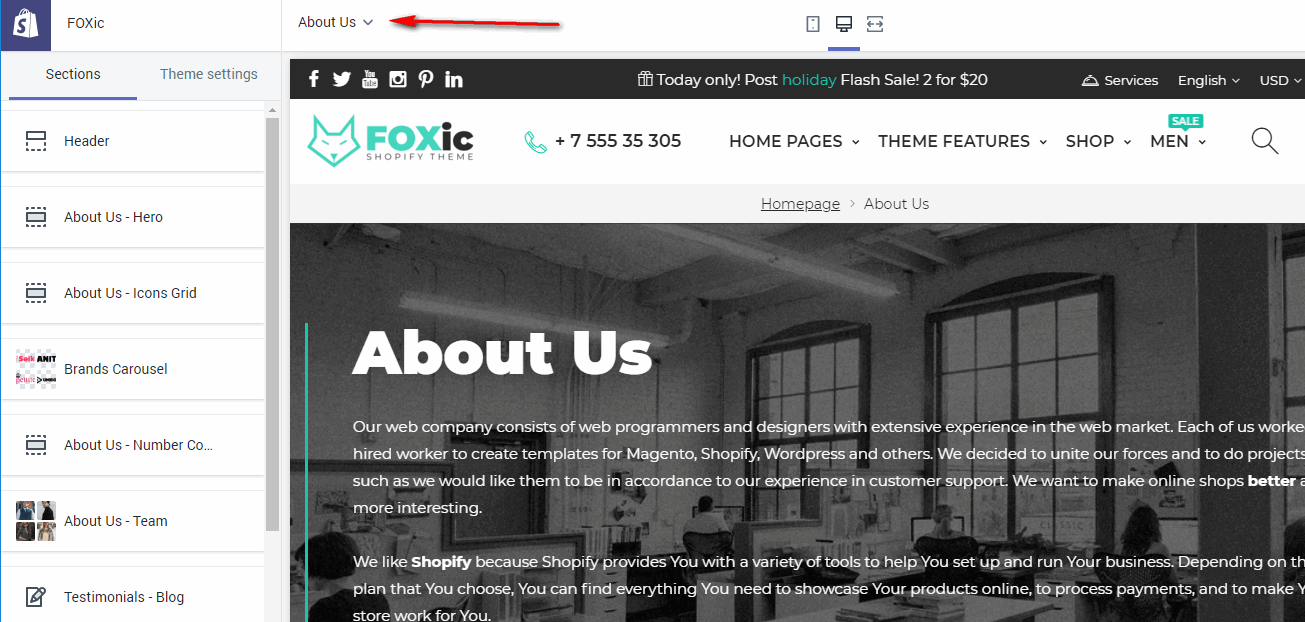
4. Edit About Us sections
Create Gallery
1. Login to Your shopify store. Go to Online Stores -> Pages.
Next
2. Click Add page
3. Choose template page.gallery, write Page Title Gallery and click save
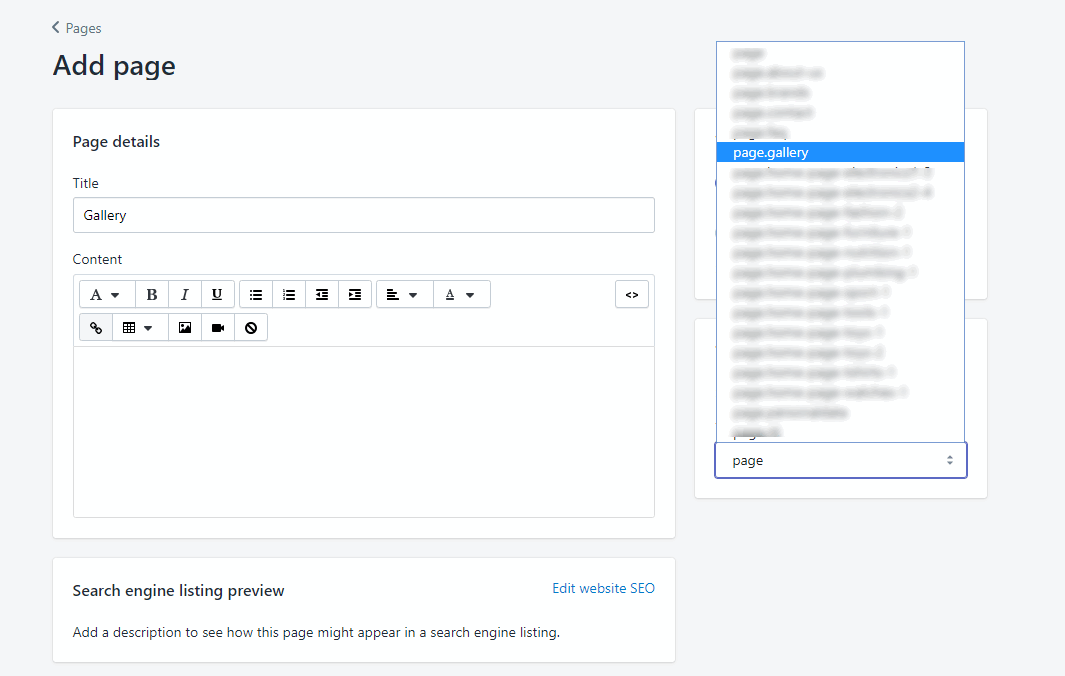
Click Save
You have created your 'About us' page. You can add the 'Gallery' page to any navigation.
Next step edit 'Gallery' page:
1. Go to Online Store
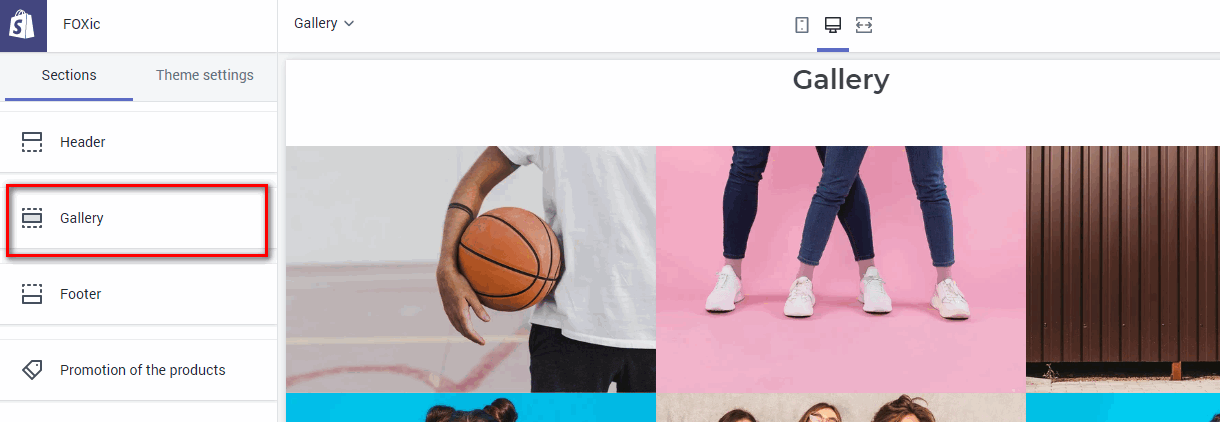
2. Click Customize
3. Find and click Gallery from navigation
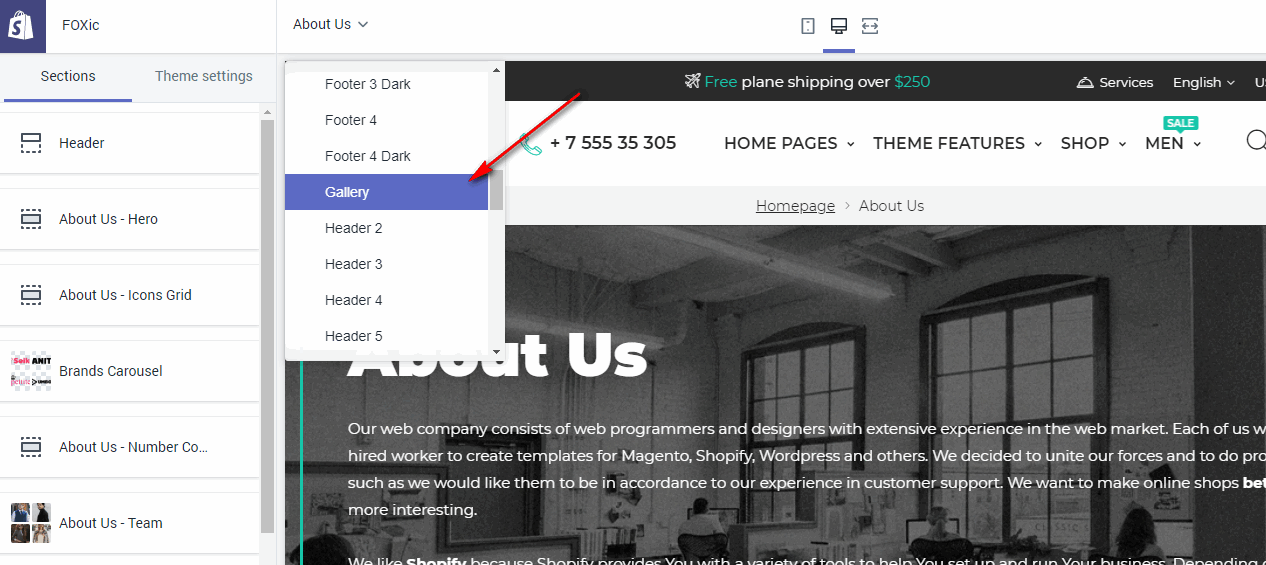
4. Edit Gallery sections
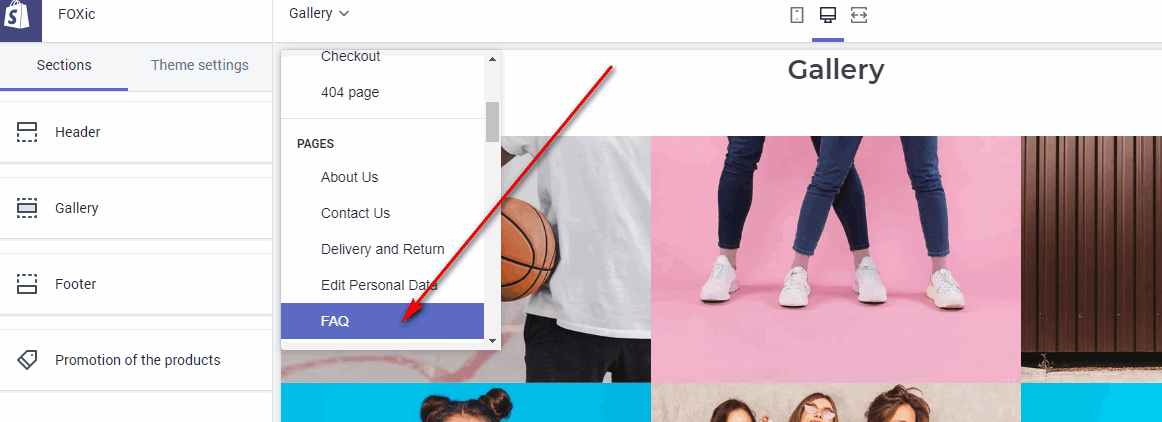
Create Faq page
1. Login to Your shopify store. Go to Online Stores -> Pages.
Next
2. Click Add page
3. Choose template page.faq, write Page Title Faq and click save
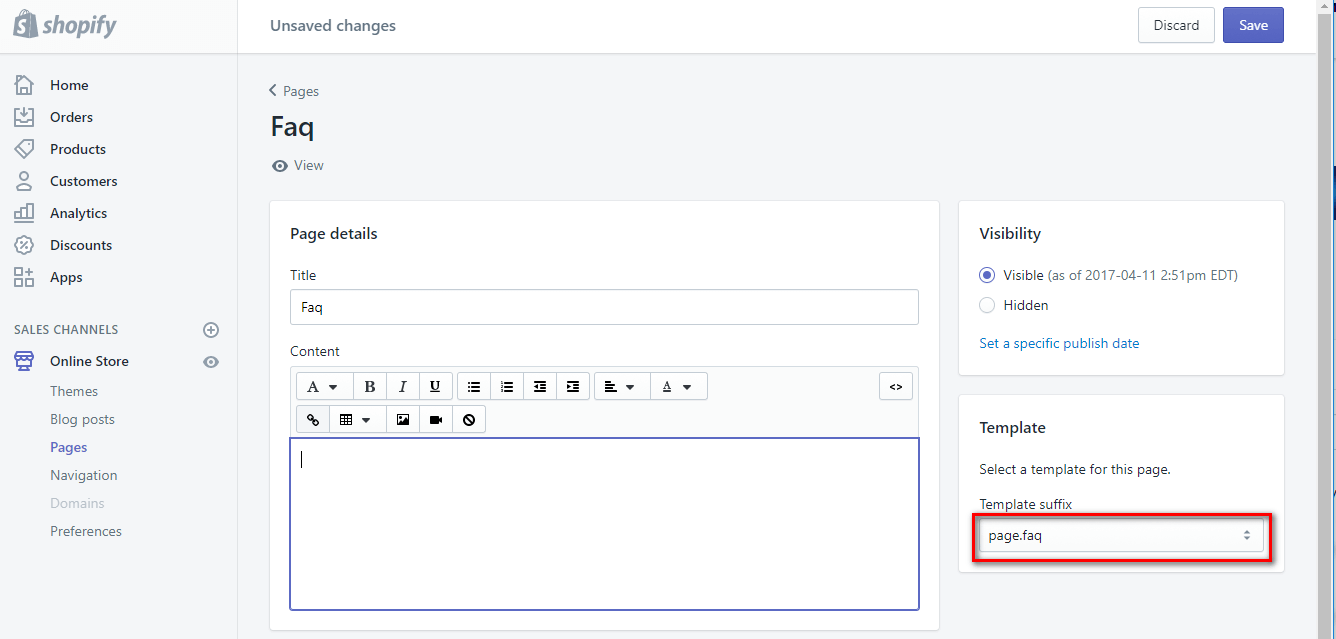
Click Save
You have created your 'Faq' page. You can add the 'About us' page to any navigation.
Next step edit 'Faq' page:
1. Go to Online Store
2. Click Customize
3. Find and click Faq from navigation
4. Edit Faq sections

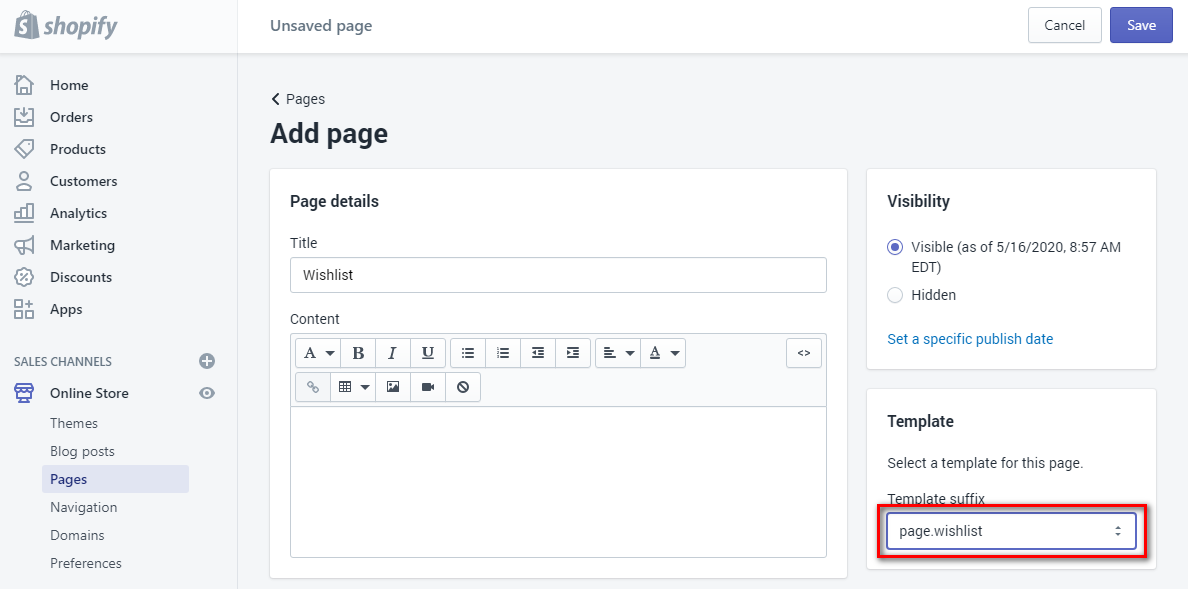
Create Wishlist
1. Login to Your shopify store. Go to Online Stores -> Pages.
Next
2. Click Add page
3. Choose template page.wishlist, write Page Title Wishlist and click save
Next step enable 'Wishlist' option:
1. Go to Online Store
2. Click Customize
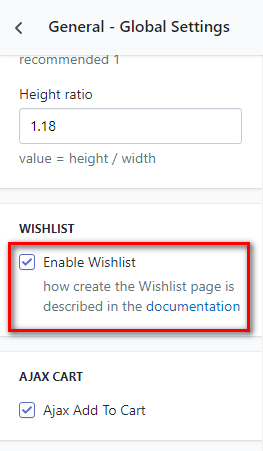
3. Click Theme Settings > General - Global Settings
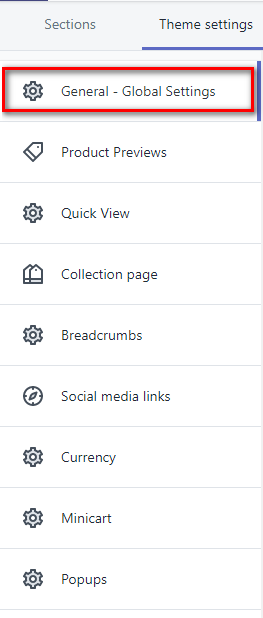
4. Find Wishlist and check Enable
Font
You can include a font from one of three sources:
- Shopify's font library
- Google's font library
- Custom font
How to select new Font:
1. Go to Online Store, select your theme and click Customize
2. Click Theme Settings > Typography Font
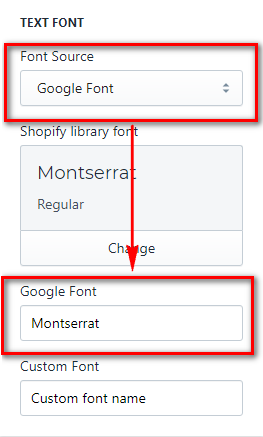
3. Select Font Source option
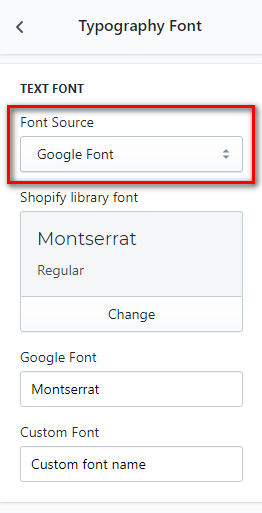
4. Fill the field corresponding to the selected Font source
5. Click Save
How to add Custom Font
This features is advanced and is not supported by BigSteps. You need to know CSS and Liquid.
1. Upload font files (.eot,.woff,.ttf,.svg) into the assets folder of your theme.
2. Open the file assets/font.css.liquid. To add custom fonts to website use @fontface:
1 2 3 4 5 6 7 8 | @font-face { font-family: "MyFont"; src: url('{{ "myfont.eot" | asset_url }}'); src: url('{{ "myfont.eot" | asset_url }} ?#iefix') format("embedded-opentype"), url('{{ "myfont.woff" | asset_url }}') format("woff"), url('{{ "myfont.ttf" | asset_url }}') format("truetype"), url('{{ "myfont.svg" | asset_url }} #myfont') format("svg");} |
where MyFont - your Font name
3. Select option Custom Font in Font Source (Theme Settings > Typography Font)
4. Enter your Font name text in the field Custom font
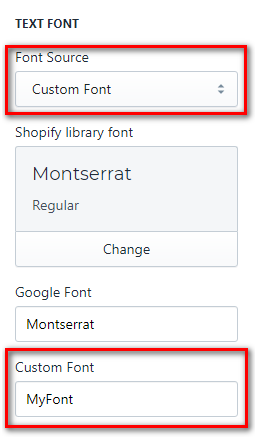
5. Click Save
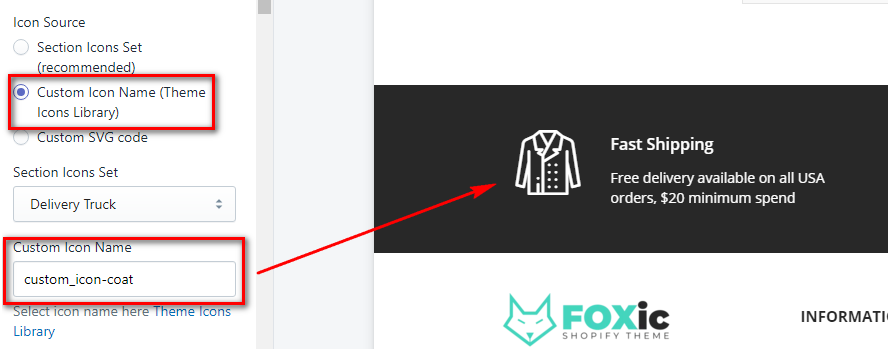
Icons
FOXic uses simply and flexible icon library IcoMoon.
IcoMoon is striving to build and provide the best iconography and icon management tool for perfectionists.
How to add Custom Icon Library
This features is advanced and is not supported by BigSteps. You need to know CSS and Liquid.
1. Create your icon(s) and save as an SVG file(s).
2. Go to IcoMoon App.
3. Import icons
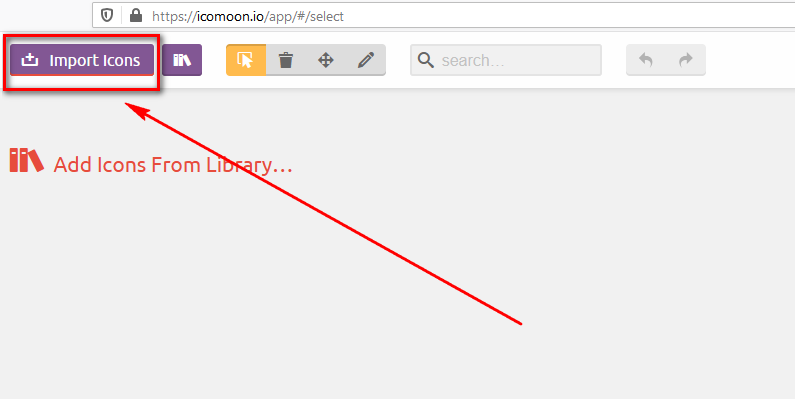
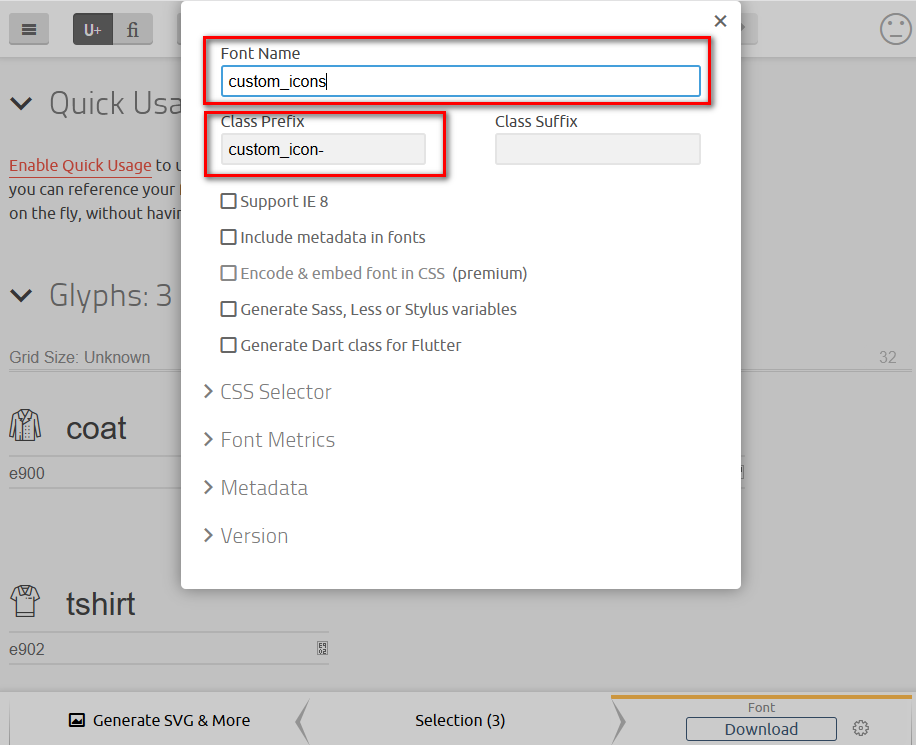
4. Click Generate Font > Properties and rename your Font Name and Class Prefix
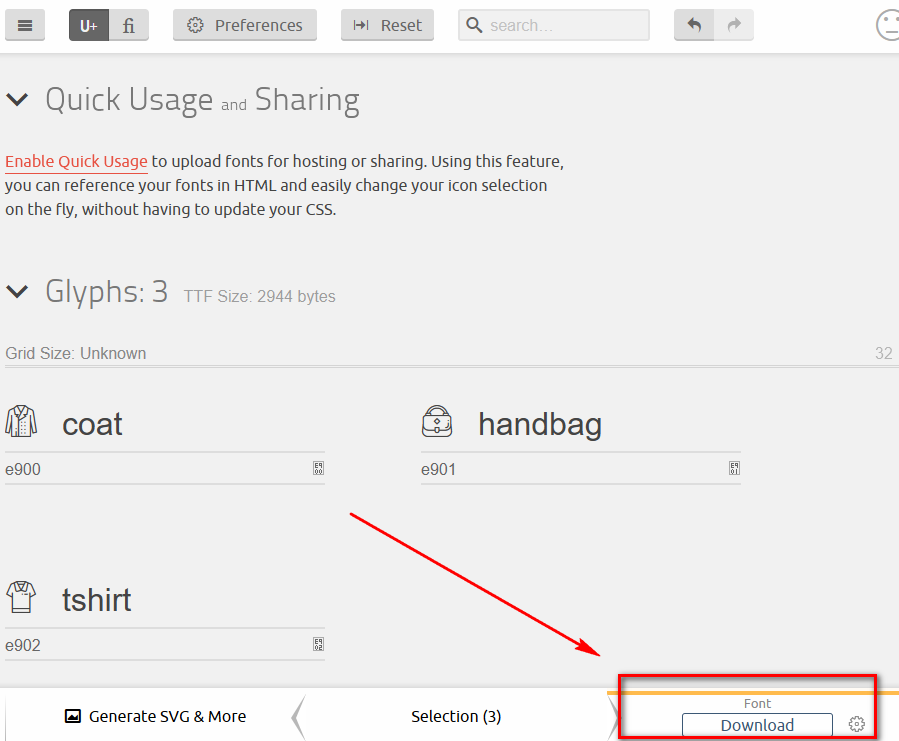
5. Download Font, unzip archive and copy all files from font folder to assets folder of your theme
6. Open the file assets/custom.css. Copy and paste the content of the file style.css. Remove 'font/' in the each url path/
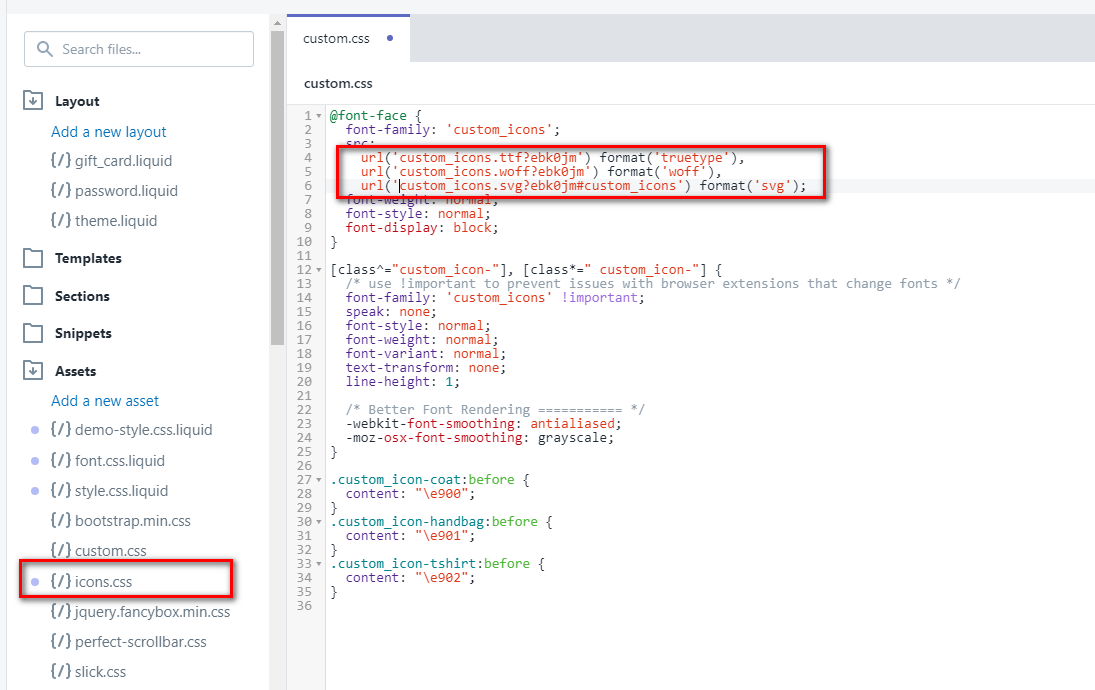
7. Now you can use your icons in the admin or in the HTML code